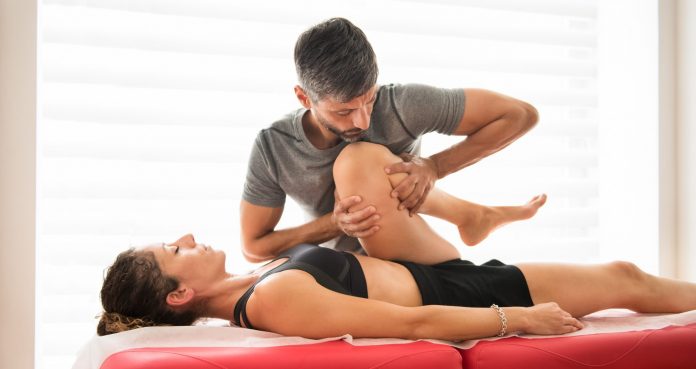
Best mobility exercises to improve range of motion.
One of the worst things you could do when you enter the gym is to go straight into your workout. However, that is precisely what most people do. Warming up by doing a few mobility exercises is better and can significantly reduce your chances of an injury, improve athletic performance, and facilitate recovery post-workout. Below are the eight best mobility exercises you can do as part of your warm-ups.
Best Mobility Exercises
- Dumbbell External Rotation
- Foam Rolling
- Standing Hip Opener
- Shoulder Pass Through
- Low Lunge with Push Back
- Seated Toe Crunch
- Thoracic Bridge
- Biceps Stretch
Dumbbell External Rotation
The dumbbell external rotation improves mobility in your shoulders. Your rotator cuffs have a limited amount of mobility to start with. This is why it can be easy to get an injury there if you don’t use the proper form for pushing exercises and warm them up prior. Below is a step-by-step guide on how to do one of the best mobility exercises.
How to
- Choose a light dumbbell and stand with the dumbbells in each hand.
- Let your hand hang down and lock your elbows to your sides.
- Bending your elbows at your side, raise the dumbbells until your lower arms parallel the floor. This is your starting position.
- Keeping your elbows pinned to your sides, slowly turn the dumbbells outward by moving your forearms.
- Pause and then turn your arms inwards to return the dumbbell to the starting position and complete the rep.
- Repeat for as many reps as it takes your shoulders to warm up.
Benefits of Shoulder Rotator Cuff Dumbbell Extension
- This exercise increases mobility and stability in your shoulders.
- It builds strength and improves the range of motion at your shoulders.
- It helps to prevent rotator cuff injuries by increasing flexibility.
Foam Rolling
Foam rolling is a self-myofascial release (SMR) technique that can be very effective when used as a warmup. This trial on athletes with experience in resistance training found that foam rolling increased mobility and flexibility (1). Below, we share a step-by-step guide on foam rolling your quads, but note that you can foam roll multiple other muscles.
How to
- Put the foam roller on the floor and lie face down, putting the middle of your thighs on it.
- Position your forearms like you are doing a plank and engage your core.
- Keep your ribs down and your chin tucked in. Slightly tuck your pelvis to prevent your lower back from sagging.
- Now, your legs should be straight with your feet off the floor.
- Keep your body properly aligned. Slowly roll, ensuring that you hit your legs from your hips to your knees.
- Repeat this multiple times, pausing at any parts where you’re sore until your discomfort reduces.
Benefits of Foam Rolling
- Foam rolling can help you ease muscle pain by reducing soreness and inflammation.
- Foam rolling effectively increases your range of motion, especially when combined with stretches.
- This routine can help to ease tension in the back and relieve back pain when done on the back muscles.
- Foam rolling breaks up tightness in your muscles, which can help you relax better.
Standing Hip Opener
Standing hip openers are great for people with a problem squatting by helping to reduce excessive tightness in their hips. Here is a step-by-step guide on how to do the standing hip opener.
How to
- Stand with your feet hip-width apart and place your hands on your hips.
- Brace your abs and then raise your right knee to waist level in front of your body. Keep it bent at an angle of 90 degrees.
- Looking straight ahead, open your hips out to the side by taking your knee out to the side. Ensure that you keep this movement under control.
- Rotate your knee back to the front of your body to complete the rep and then back to the side to start another without dropping your legs.
- After enough reps, drop your knee and repeat steps 2 to 4 with your left knee.
Benefits of Standing Hip Opener
- Standing hip openers improve your hips and legs range of motion.
- It increases your mobility and flexibility.
- This exercise is also beneficial for your posture and balance.
Shoulder Pass Through
The shoulder pass through is a great exercise that engages your delts. It helps increase shoulder muscle mobility and strengthen your rotator cuff. Below is a step-by-step guide for doing this routine.
How to
- Grab a PVC pipe or stick and stand with your feet at shoulder-width distance apart.
- Keep your arms in front of you, holding the pipe with a wide overhand grip. It should be resting on your quads.
- Tuck your stomach in and contract your lower back muscles. This is your starting position.
- Raise the pipe above your head, maintaining your grip and keeping your arms straight.
- Take it over your head and backward as far as possible without bending your elbows.
- Pause briefly, then return to the starting position to complete the rep.
- Repeat for as many reps as you desire.
Benefits of Shoulder Pass Through
- It mobilizes and boosts blood flow in your shoulder muscles.
- Shoulder pass throughs can help increase your shoulder stability.
- Shoulder pass throughs can also help strengthen your upper back muscles.
Low Lunge With Push Back
The low lunge with pushback is a great way to boost mobility in your hips and stretch your quad and groin. Below is a step-by-step guide that shows exactly how to do this routine.
How to
- Assume the downward dog position with your arms out in front and your legs behind.
- Shift into a low lunge by taking your left leg in front just outside your left hand. Your right leg will go down into the lunge at this point.
- Push with your left leg to lift and return it to its former position at the back.
- Next, take your right leg forward to assume the low lunge again, but with your right foot outside your right hand this time.
- Push your right leg into the ground to lift it and return it to the downward dog position again to complete the rep.
- Repeat for multiple reps.
Benefits of the Low Lunge with Push Back
- This exercise releases your hip flexors, leading to more mobility in the hips.
- It also works on your quads, hamstrings, and lower back flexibility.
- The low lunge with pushback also stretches your hip flexors, hamstrings, and groin, leading to better circulation.
Seated Toe Touch
We often use the seated toe touch as a measure of flexibility, and it made our list of the best mobility exercises. In addition, this routine can help to improve the mobility from your lower back to your calves. Below is a step-by-step guide on how to do the seated toe touch for flexibility.
How to
- Sit upright with your legs stretched out in front of you and your arms by your sides.
- Keep your torso upright, lean forward at the hips, and touch your toes without your hamstrings lifting off the floor or bending at your knees.
- Return your arms to your sides to complete the rep.
- Repeat for as many reps as you desire.
Benefits of the Seated Toe Touch
- Increasing mobility in your hips by stretching your hamstrings.
- It prevents injuries in the hamstring and calves by making them more flexible.
- This routine also works on your lower back.
Thoracic Bridge
The thoracic bridge is a great exercise that targets your glutes, chest, shoulders, and thoracic spine. Below is how to do the thoracic bridge.
How to
- Assume a kneeling push-up position.
- Keeping your left arm on the floor, rotate your body to the right.
- Thrust up with your back and glutes to form a bridge. Your heels should end up planted on the floor.
- Cross your right hand overhead to the left.
- Return to your initial position and repeat steps 1 to 4, keeping your right hand on the floor and rotating to your left.
Benefits of the Thoracic Bridge
- Builds strength and mobility in your chest, shoulders, thoracic spine, and arms.
- It also uses the range of motion to improve your shoulder and wrist strength.
Biceps Stretch
Bicep stretches are a great way to increase your flexibility and strengthen your biceps. They also improve your range of motion. Below is a step-by-step guide on how to do a bicep stretch.
How to
- Stand with your legs shoulder-width apart beside a wall on your right side.
- Raise your right arm behind you at shoulder level and put your right hand on the wall.
- Your arm should be perpendicular to the wall with your body parallel.
- Next, rotate to your left while keeping your right arm stationary.
- Repeat with your left hand to complete the rep.
- Do as many reps as you desire.
Benefits of Bicep Stretch
- Bicep stretches relieve muscle tightness and tension, which improves your performance.
- They increase your range of motion and flexibility.
- Bicep stretches also complement your upper body workouts.
Benefits of Mobility
Working on your mobility can prime your joints and muscles for your workouts. This also facilitates your mind-muscle connection and pumps. Research shows that using your mind-muscle connection helps to improve muscle growth (2). In addition, it helps with post-workout recovery and improves your range of motion. In short, you should make performing the mobility movements an indispensable part of your warm-up ritual to prevent injury and enhance workout performance.
More Best Exercises
If you enjoyed the info we provided in our best mobility exercises write-up, check out some of our other best exercises below:
- The 9 Best Chest Exercises to Build a Massive Chest
- The 10 Best Back Exercises for a Broad Strong Physique
- The 12 Best Exercises for Ripped Abs
Follow us on Instagram, Facebook, and Twitter for more workout tips!
References
- Škarabot, J., Beardsley, C., & Štirn, I. (2015). Comparing the effects of self-myofascial release with static stretching on ankle range-of-motion in adolescent athletes. International journal of sports physical therapy, 10(2), 203–212.
- Halperin, I., & Vigotsky, A. D. (2016). The mind-muscle connection in resistance training: friend or foe?. European journal of applied physiology, 116(4), 863–864. https://doi.org/10.1007/s00421-016-3341-y


