The optimal way to build a huge back using different workouts!
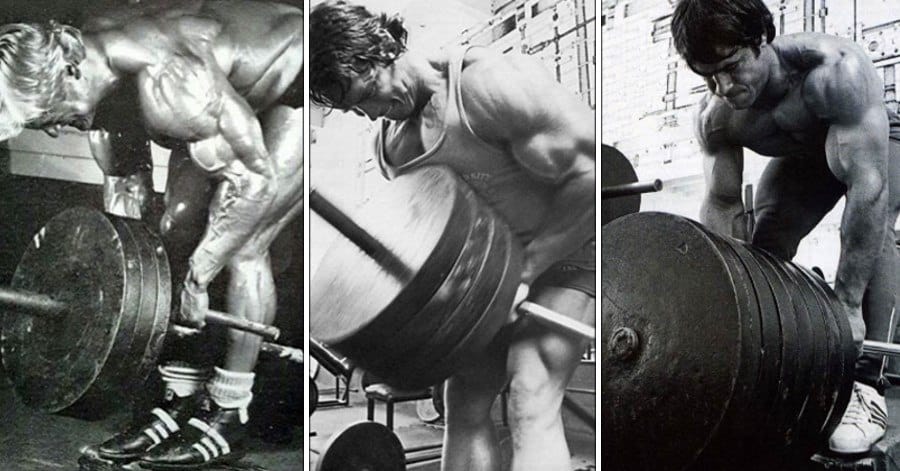
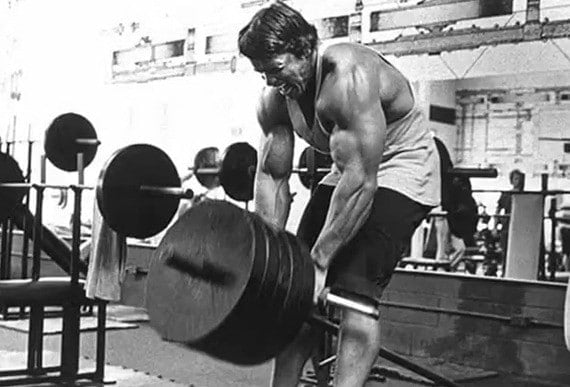
Many bodybuilding fans have watched Pumping Iron – the critically-acclaimed bodybuilding documentary that showcased legendary bodybuilders. If you don’t remember watching the movie, you certainly would have seen snippets of Arnold Schwarzenegger T-bar rowing to a monstrous V-taper.
Pumping Iron is a little too old-school for you? How about you check out its younger sibling – Generation Iron?
Bodybuilders have a saying; if you want your back to grow, you gotta row. If you want a V-taper, you need to maintain a balance between rowing and pulling back exercises. While horizontal pulling exercises (pull-up, pull-down) help in building a wide back, vertical pulling movements (t-bar row, cable row, dumbbell row) get you that much sought-after back thickness.
How To Perform The T-Bar Row
Do not fret if you do not have access to a T-bar row machine at your gym. You could perform the exercise using a barbell. Follow these steps to make the most out of the T-bar row –
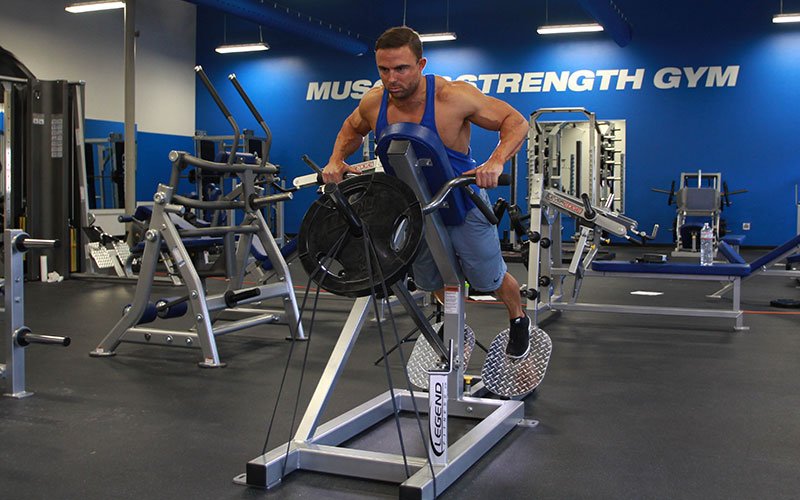
If you have access to a T-bar row machine:
- Step onto a T-bar row platform and stand with one foot on either side of the bar.
- Place your feet slightly wider than shoulder-width apart.
- The remaining steps will be the same as the barbell T-bar rows described below.
If you do not have a T-bar row machine at your gym:
- Place one end of a barbell into a corner.
- Rest some weight plates or a heavy dumbbell on the hinged side to hold it down (landmine setup).
- Load the opposite end of the bar with an appropriate weight.
- Take position by standing with one foot on either side of the bar.
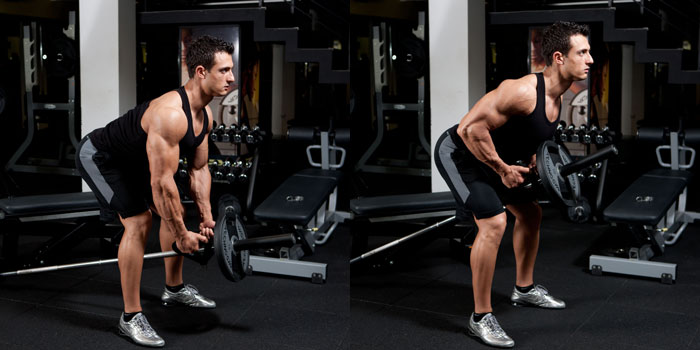
- Hinge at your hips until your torso is at a 45-degree angle with the floor.
- Hook a V-grip handle under the weighted end at the bar’s neck and grab it with both hands.
- While maintaining the natural arch in your back, squeeze your shoulder blades together and pull the bar until the plates touch your chest.
- Pause and contract your lats at the top of the movement.
- Slowly return to the starting position.
- Repeat for recommended reps.
Related: This Is How To Master The T-Bar Row For Massive Back Gains
Muscle Worked While Performing The T-Bar Row
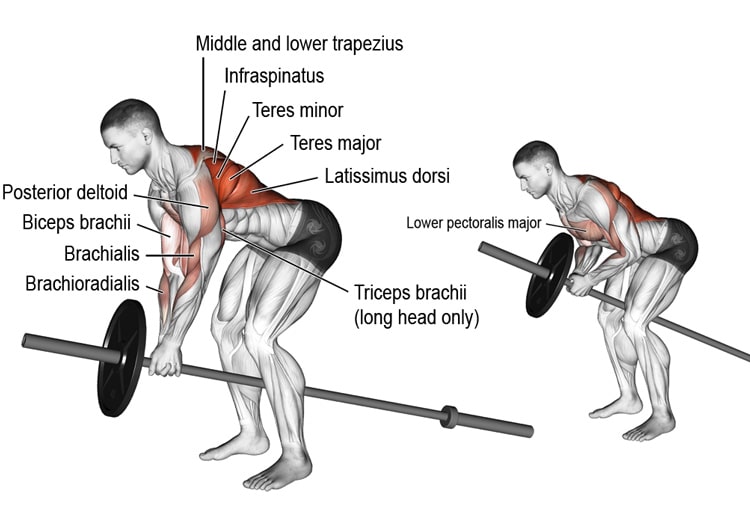
The T-bar row might look easy but will test your mettle – they are one of Governator’s favorite exercises for a reason, after all. It is an overall upper body posterior muscle builder and will leave you exhausted by the last set. Here is the list of muscles worked:
- Latissimus dorsi: It is the largest back muscle and is located on the sides of your back. Latissimus dorsi (aka lats) are responsible for shoulder extension and adduction.
- Bicep brachial: Your biceps are your main elbow flexors, and you will be using them to perform T-bar rows.
- Forearms: You need a strong grip to perform the exercise optimally. If you lack a solid grip, this exercise will help you build one over time.
- Middle trapezius: It is the diamond-shaped muscle that covers much of your upper back. The middle trapezius (aka traps) is primarily responsible for the retraction of the shoulder girdle.
- Rhomboids: Located under your mid-traps.
- Posterior deltoids: Rear delts are responsible for horizontal extension and external rotation of the shoulder joint.
- Erector spinae: It is the collective name for the small muscles that make up your lower back. The erector spinae works isometrically or statically during T-bar rows to hold your spine in a stable position and prevent your back from rounding.
- Glutes, hamstrings, and quadriceps: You cannot exclude your lower body from the exercise (unless you are using the chest-supported T-bar machine). Your glutes and hamstrings contract to hold your hips in place while your quadriceps work hard to stabilize your knees.
Next Read: 4 Exercises to Alleviate Lower Back Pain
Benefits of the T-Bar Row
Making the T-bar row a constant in your back training entails the following benefits:
1. A Thick and Strong Back
Rowing movements help develop a thick back, and the T-bar row follows an optimal range of motion that recruits the maximal muscle fibers in your back.
The compound exercise is also a great strength builder and can aid in other pulling exercises such as pull-ups and deadlifts.
2. Improved Functional Strength
T-bar row works your entire posterior chain. Since it is a compound (multi-joint) movement, the T-bar row helps strengthen muscles that you use in your day-to-day and outdoor activities.
3. Better Core Stability
Since you spend all your time bent over while performing the exercise, it helps develop core stability and strength.
4. Better Posture
A wide and thick back (results of the t-bar) can help improve your posture. You will hardly ever see someone with a solid V-taper slouching or having a bad body posture.
5. Promotes Balance and Symmetry
The unilateral (single-arm) variations of the T-bar row can help improve muscle imbalances and strength. Performing the exercise on one side at a time can help focus on the muscle and improve your mind-muscle connection.
Also Read: 6 Ways To Improve Your Mind-Muscle Connection
6. Versatility
Different variations of the T-bar row allow you to use different hand positions and hence work your back from a variety of angles. The most common grips for T-bar include:
- Close-neutral
- Shoulder width-neutral
- Wide-overhand
- Narrow-underhand
On top of that, since most T-bar equipments have a plate-loading mechanism, you can use low denomination weights to increase your workload in small increments until you hit the right spot.
Common T-Bar Mistakes To Avoid
The T-bar row requires balance and core stability and leaves a lot of room for error. Here are the most common T-bar mistakes:
1. Using 45-Pound Weight Plates
Most people make the mistake of exclusively using 45lb weight plates on the T-bar machine. Using several smaller weight plater rather than a few big ones have the following benefits:
a) It helps follow a longer range of motion since the smaller plates have a smaller diameter compared to the 45lb plates.
b) Helps you nail the perfect weight by using smaller denominations.
Related: Full Range Of Motion Vs Partials: Which Is The Way To Go?
2. Maintaining Straight Legs
Locking out your legs and knees can cause back, knee, or hip injuries. Make sure that you have your knees slightly bent throughout the exercise as it gives you a solid base to hold yourself in place.
3. Rounding Your Lower Back
We cannot help but cringe when we see someone rounding their back while performing the T-bar row. Rounding your back during the lift leaves your spine vulnerable to injuries – and makes you look like a rookie!
4. Flexing Your Wrists
To lift heavier while performing the T-bar rows, many gym-goers flex their wrists. Not only does this not help, but it also puts unwarranted stress on your wrists and increases the odds of an injury. It can also cause your grip to fail prematurely.
Next Read: Build a Massive Back Like The Legend Dorian Yates
5. Flaring Your Elbows
Flaring your elbows out can cause your chest to cave in and limit your ability to contract your back muscles. Keep your elbows close to your body throughout the range of motion.
6. Pulling With Your Biceps
While there is no way to avoid bicep recruitment during the exercise, leading with your elbows will optimally engage your back and help you build a thick back. Pulling with your elbows also allows you to contract your back muscles efficiently.
7. Not Using Lifting Accessories
Many gym-goers leave gains on the table by not using lifting accessories. Accessories like weight lifting straps and belt can help improve your form, reduce the chances of an injury, and set you up for lifting heavier.
Check Out: 5 Lifting Accessories You Should Have In Your Gym Bag
T-Bar Row Variations and Alternatives
1. Chest Supported / Lying T-Bar Row
The chest-supported T-bar row is a great variation for beginners or people who have lower back issues.
Steps:
- Load the T-bar machine with an appropriate weight.
- Lie prone on the pad and grab the handles with an overhand grip.
- Brace your core and pull the T-bar towards your chest.
- Contract your shoulder blades and keep your elbows flared in throughout the movement.
- Your upper back muscles and shoulder blades should be fully contracted at the top of the movement.
- Slowly return to the starting position.
- Repeat for recommended reps.
2. Barbell Row
Barbell rows are a staple in most back training routines. The barbell row is quite similar to the T-bar row with the main difference being that the barbell row allows you to move the weight through greater degrees of freedom.
Steps:
- Stand upright and grab a barbell with a shoulder-width overhand grip.
- Push your shoulders down and back while maintaining an exaggerated chest forward position.
- Hinge at your hips and lower your torso until it is at a 60-degree angle with the floor.
- Pull back your elbows while keeping them close to your body as you lift the bar towards your upper abdomen.
- Pause and contract your lats at the top of the movement.
- Return to the starting position with a slow and controlled motion.
- Repeat for recommended reps.
3. Pendlay Row
Pendlay rows are a great T-bar alternative, especially for powerlifters as it targets the exact opposite muscles of the bench press. It allows for greater stability when performing heavy presses.
Steps:
- Unlike the orthodox barbell row, the starting position of the bar in the Pendlay row will be on the floor.
- Stand with a shoulder-width grip and grab the bar with a pronated grip.
- Get into position by pushing back your hips and lowering your torso until it is parallel to the floor.
- Pull the bar towards your lower chest while keeping your elbows close to your sides.
- Pause and contract your lats at the top of the movement.
Related: The Pendlay Row vs The Barbell Row
4. Meadows Row
The Meadows row is named after the late bodybuilder, John Meadows. The Meadows row is a single-arm landmine row that allows a greater stretch at the bottom of the movement.
Steps:
- Stand next to a barbell that is in a landmine setup or wedged into the corner of a wall.
- Stand in a staggered stance with the leading foot perpendicular to the bar.
- With your right foot as the leading foot, bend over at the waist, and grab the end of the bar with your left hand using an overhand grip.
- Rest your right elbow on your thigh for support.
- While keeping your elbow close to your body, pull up the bar until it is just outside your chest.
- Pause and contract your lats at the top of the movement.
- Slowly return to the starting position.
- Repeat for recommended reps before switching sides.
Check Out: 5 Landmine Exercises For A Shredded Body
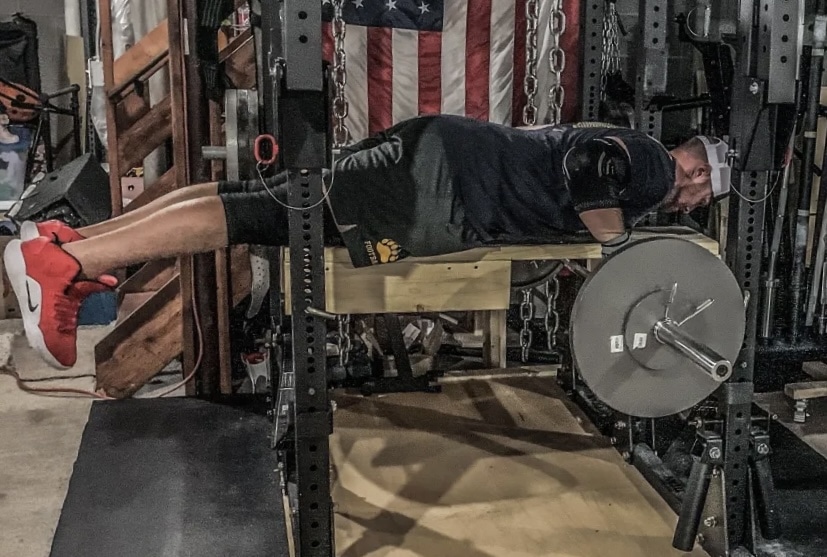
5. Seal Row
The seal row is an isolation variation of T-bar and barbell rows. The exercise locks your body in place, taking away the ability for you to heave the weight as you perform the lift.
Steps:
- Elevate a flat bench by placing a couple of aerobic steps under it on both sides.
- Lay on the bench in a face-down position. Keep your leg elevated and make sure your body is in a straight line throughout the movement.
- Grab a barbell with an overhand grip.
- While maintaining a stable core, lift the bar to your lower chest by pulling your elbows towards the roof.
- The bar should hit the bottom of the flat bench at the top of the movement.
- Pause and squeeze the life out of your lats at the top of the movement.
- Lower the bar with a slow and controlled motion.
- Repeat for recommended reps.
6. Inverted Row
Inverter rows are one of the best bodyweight T-bar row alternatives. This exercise might look easy but will leave you begging for mercy when it is done with you.
Steps:
- Stand in a squat rack or front of a Smith machine.
- Set the bar at your waist height. This will allow your arms to fully extend while keeping your body off the floor.
- Get under the bar and lie down on your back.
- Reach up for the bar and grab it with an overhand grip. Your arms should be fully extended at this point.
- Your body will be suspended or just off the floor, with your heels being the only thing in contact with the floor.
- While keeping your core and glutes contracted, brace your lower back and keep your body in a straight line.
- Pull yourself up until your chest touches the bar.
- Keep your elbows close to your sides throughout the movement.
- Pause and contract your lats at the top of the movement.
- Slowly return to the starting position.
- Repeat for recommended reps.
Next Read: Barbell Row VS Inverted Row, Which One Reigns Supreme?
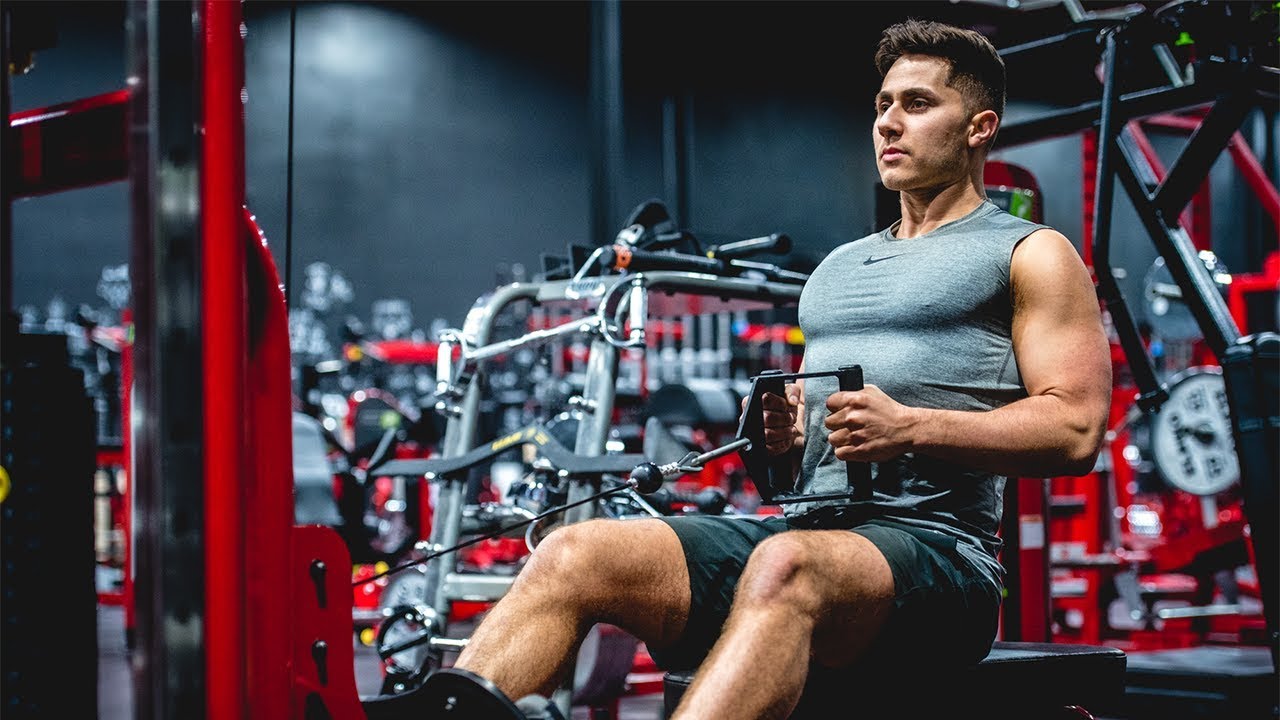
7. Seated Close Grip Cable Row
For lifters who fancy themselves a cable exercise, you cannot go wrong with the seated close-grip cable rows:
Steps:
- Grab a v-handle and sit back on the machine.
- Maintain an upright torso throughout the exercise.
- Sweep back with your elbows and pull the v-handle towards your naval/lower abdomen.
- Pause and contract your lats at the top of the movement.
- Slowly return to the starting position.
- Repeat for reps.
Must-Try: Build A Thick and Wide Cobra Back With This Workout
Conclusion
If you want to carve a thick and wide back, the T-bar row is a must-have in your exercise arsenal. The compound exercise might take some time to master, but the dividends it will pay in the long run make the upfront investment worth it.
For people who do not have a T-bar machine at their gym, this article lists enough variations to ensure the development of your posterior muscles.
Which is your favorite T-bar row variation? Let us know in the comments below. Also, be sure to follow Generation Iron on Facebook, Twitter, and Instagram.

