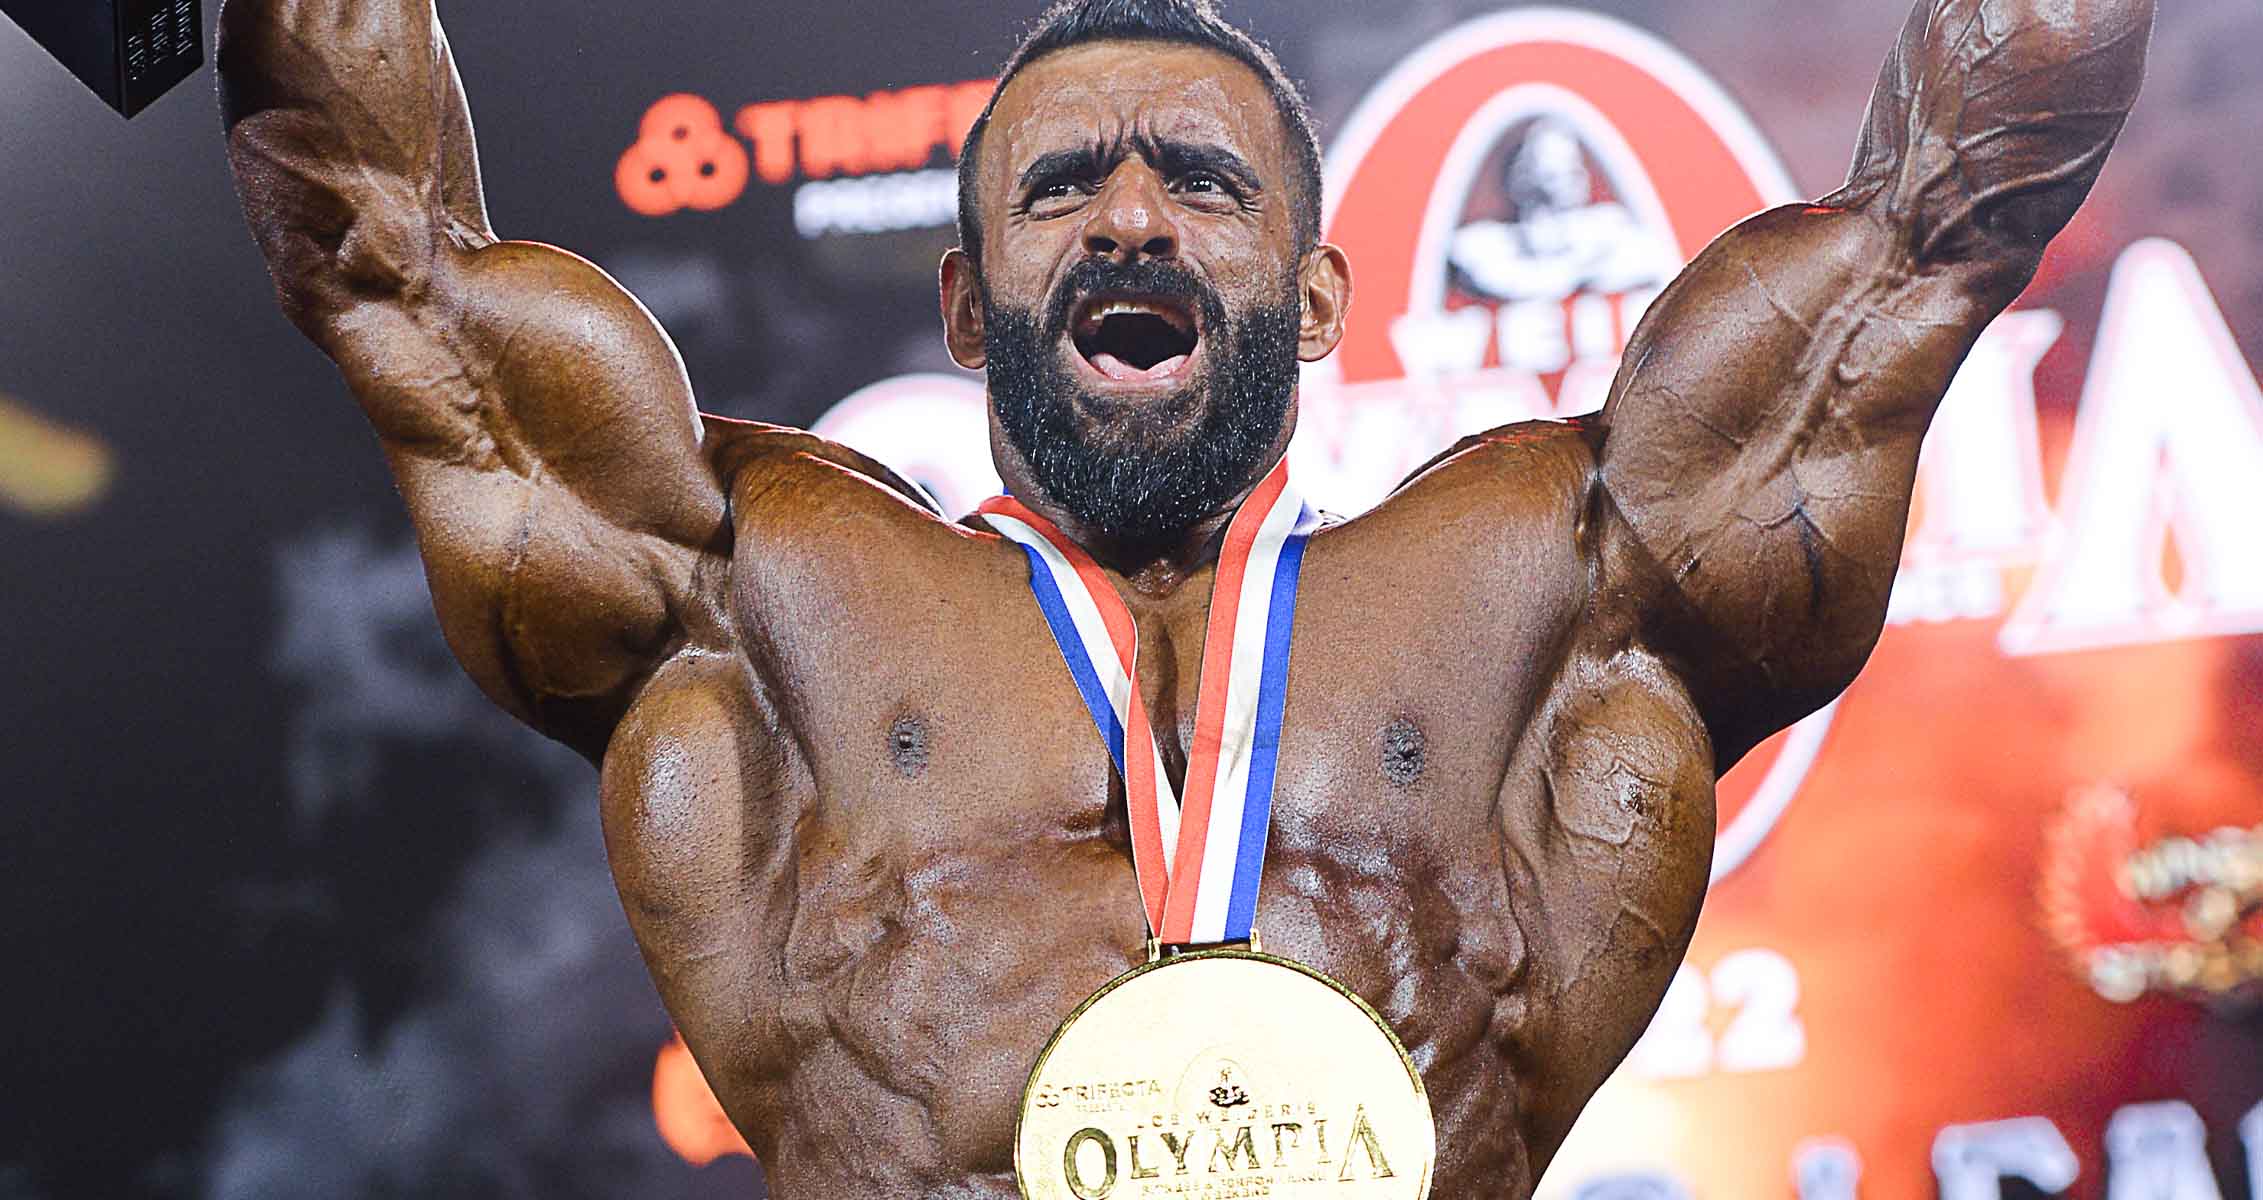
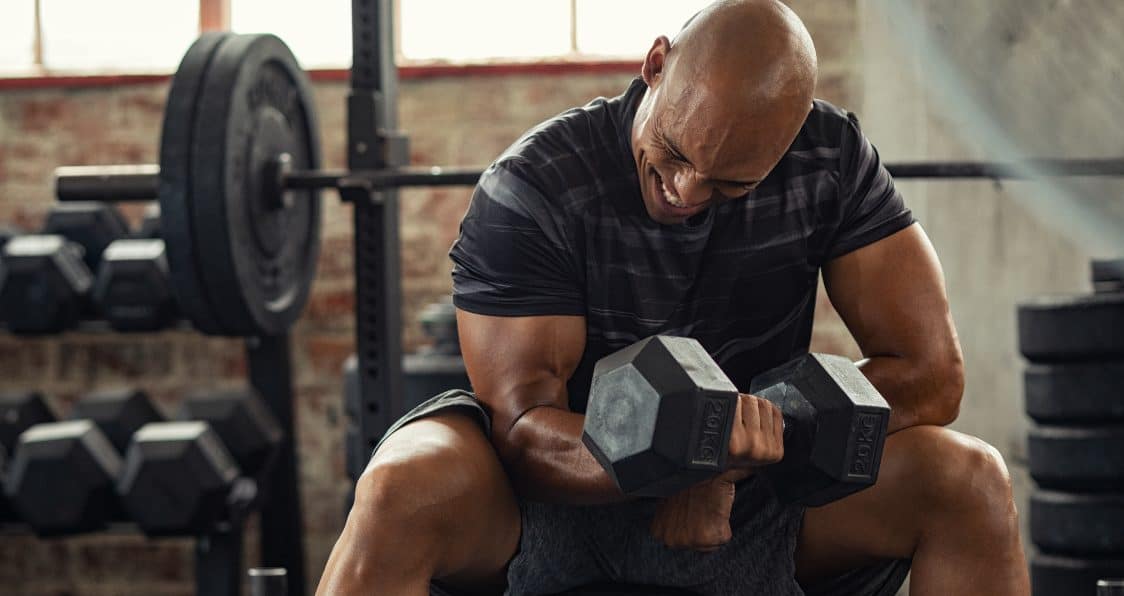
Hadi Choopan looks ready to defend his 2022 Olympia title.
Hadi Choopanis the reining 2022 Olympia champion and will return to the stage this November 2nd 2023 in Orlando, Florida to defend his title. As the Men’s Open division continues to get deeper and deeper, Choopan is making improvements to remain at the top of Men’s Open in the IFBB Pro League. He recently shared an offseason physique update where he is looking as big as ever.
In December of 2022, Choopan was able to reach the top of the scorecards during the biggest competition of the year in professional bodybuilding. This came after many close calls, including a third-place finish in 2021 Olympia. Over the years, Choopan has impressed with his incredible conditioning and symmetry within his physique. As the division gets bigger and better, Choopan seems to be doing the same.
The 2022 Olympia saw two-time champion, Big Ramy take a step back but some new threats emerged. Derek Lunsford made the jump from 212 and finished as the runner-up in his first Men’s Open competition. Samson Dauda was victorious during the 2023 Arnold Classic and has made significant strides under the guidance of Milos Sarcev.
As the calendar marches on and summer begins, Hadi Choopan continues to work to build the best physique possible.
Hadi Choopan’s Insane Physique Update
On Thursday, Hadi Choopan shared a posing video in the gym where he displays an insanely massive physique.
“The world revolted under my feet and I told the world tat I am the soldier of Persians, the owner of the kingdom, I rose and again struck the nail of the three-color flag of Iran that once again danced in the breeze, a leaf from the hostorical sando that is sleeping in my house.”
In the caption of his video, Choopan shared a message for other competitors. He is determined to win his second-consecutive title and is doing what it takes this offseason.
Many other top athletes have taken the stage this year, especially during the Arnold Classic since the prize money was raised significantly. Michal Krizo will take the stage this weekend during the 2023 Empro Classic Pro in hopes of qualifying for the 2023 Olympia. Choopan will focus on adding another Olympia title rather than taking the stage during a competition.
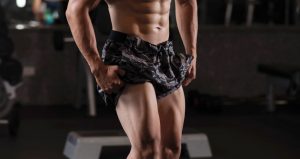
The front foot elevated split squats may be a better alternative to the Bulgarian split squats.
Are you looking to add some mass to those quads? Squats are the way to go! Not only can they help you increase muscle mass, but they also have the added benefit of boosting the strength of your leg muscles. Plus, they can give you the confidence to tackle other routines like deadlifts. In this article, we’ll review the benefits of one squat variation, the front foot elevated split squat.
Bulgarian split squats are among the most popular rear-foot elevated split squats. However, not many people know about its cousin, the front foot elevated split squat. Well, you should, as this movement is more comfortable and even offers better benefits in some aspects.
The front foot elevated split squat is a good strength training exercise that you can use to boost your leg day routine. In this guide, we discuss how to do this exercise effectively, the muscles it targets, other benefits, and even more squat variations to check out. Here’s our front foot elevated split squat exercise guide.
How to do the Front Foot Elevated Split Squat
As its name implies, you do front foot elevated split squats with your front leg elevated. Most experts think of it as an inverse of Bulgarian split squats. This movement has an intermediate difficulty level and can be done with dumbbells, barbells, kettlebells, or with your bodyweight. Here’s a step-by-step guide on how to do the front foot elevated split squat.
Step on a two-four inches high platform, e.g., an Olympic platform or bumper weight plates. Hold a barbell, dumbbell, or kettlebell if you add resistance.
Take a large step back, ensuring your front leg is strong and stable on the platform. Your back leg should be in its lane and not directly in line with your front leg for more balance.
Adjust your back leg until both legs are straight, and you stand upright with no bending in your knees. If your back foot rest on the ball rather than flat, this is still okay; it depends on your ankle mobility. This is your starting position.
Brace your core and slowly lower your back leg with control. Your knee should be one or two inches above the ground. Keep your shoulders pulled back and your upper body upright.
Use your front foot to push yourself back to the starting position and complete the rep. Keep your torso as upright as possible while returning.
Do as many reps as desired, then switch leg positions and repeat.
Tips
This workout can be challenging if you do them for the first time. Keep your entire front foot in contact with the platform throughout each rep. Your shoulders should be over your hips during each rep, and try not to let your front knee go past the toes at the bottom. If it does, adjust your back leg further.
Choosing a comfortable step-back distance will help keep your back leg steady as you do this exercise. If you’re uncomfortable and shaky, you could focus on maintaining your balance instead of training your legs.
Ensure that you go low enough, as one of the benefits of this routine is an increase in the range of motion. Also, be wary of slamming your back knee into the floor while descending.
Slightly leaning forward during each rep will help to activate your glutes and hamstrings more. An upright torso is best if you’re doing front elevated split squats to build your quads.
Descend slowly to allow your glues and quads to do the work and build the muscles more by increasing time under tension. Start with your bodyweight before adding weight since this exercise can be quite difficult, even for advanced lifters. You can then progress to dumbbells and eventually a barbell as you get stronger.
Benefits
Front foot elevated split squats build and strengthen your quads, glutes, adductors, and hamstrings. Below are some more benefits of this exercise.
Muscle Hypertrophy with Lower Loads
This movement uses a range of motion that allows you to build more muscle mass with lower loads. This is great for bodybuilders looking to switch to a squat alternative that induces hypertrophy without using as much weight, maybe due to injury. This study shows that squat depth impacts muscle growth positively, even with lower loads (1).
Correct Imbalances
Front foot elevated split squats are done unilaterally, which has been shown to help address imbalances. It exposes the flaws in each leg so that you can correct them. This routine also maximizes your range of motion because the sum of your strength when using one leg individually is bigger than when using both legs.
Better Range of Motion
Doing this routine with an elevated front leg takes your hip flexion to over 90 degrees. Ninety degrees is where lunges and other splits squats stop, which makes the front foot elevated split squat better. It gives you an increased range of motion in a safe position with less weight.
Better Hip Mobility
While your front foot increases your range of motion, your back leg extends your hip flexor deeply. This leads to better hip mobility.
Less Pain
You’ll love this workout if you’re looking for a pain-free barbell squat alternative. With it, you can use less weight when using a barbell and complete a range of motion that builds muscle mass effectively.
Front Foot Elevated Split Squat Exercise Variations
Let’s cover some other squat alternatives to build your lower body.
Heel Elevated Split Squats
This exercise adds even more range of motion to your squat by adding a ramp or weight plate to your platform to elevate your heel. It’s a great way to target and grow your quads.
Double Elevated Split Squat
With the double-elevated split squat, both your front leg and back leg are elevated, giving you even more range of motion and mobility. This movement combines the front foot elevated split squat and the Bulgarian split squat, but you must ensure that both platforms are stable to prevent injury and properly engage the muscles.
Lower Body Anatomy: Thigh Muscles
The front foot elevated split squat strengthens the muscles of your lower body, specifically the thigh muscles. Your thigh muscles are split into the anterior, medial, and posterior groups (2).
Anterior – Your anterior thigh muscles are made of hip flexors, hip abductors, and quads, also known as knee extensors.
Medial – Your medial thigh muscles are the adductors that help flex your thigh.
Posterior – Your posterior thigh muscles are the hamstrings responsible for flexing your knee.
FAQs
Is front foot elevated split squat easier?
This exercise is easier than Bulgarian split squats because balancing when your front foot is elevated isn’t as challenging as when your back foot is elevated, like in Bulgarian split squats.
Is front foot elevated split squat better than rear foot elevated?
Regarding the range of motion, the front foot elevated split squat is better than the rear alternative because it gets you beyond 90 degrees, where most split squats stop.
What muscles do front split squats work?
Front foot split squats work on your quads, glutes, adductors, and hamstrings.
Bryanton, M. A., Kennedy, M. D., Carey, J. P., & Chiu, L. Z. (2012). Effect of squat depth and barbell load on relative muscular effort in squatting. Journal of strength and conditioning research, 26(10), 2820–2828. https://doi.org/10.1519/JSC.0b013e31826791a7
Attum B, Varacallo M. Anatomy, Bony Pelvis and Lower Limb: Thigh Muscles. [Updated 2022 Dec 17]. In: StatPearls [Internet]. Treasure Island (FL): StatPearls Publishing; 2023 Jan-. Available from: https://www.ncbi.nlm.nih.gov/books/NBK482445/?report=classic
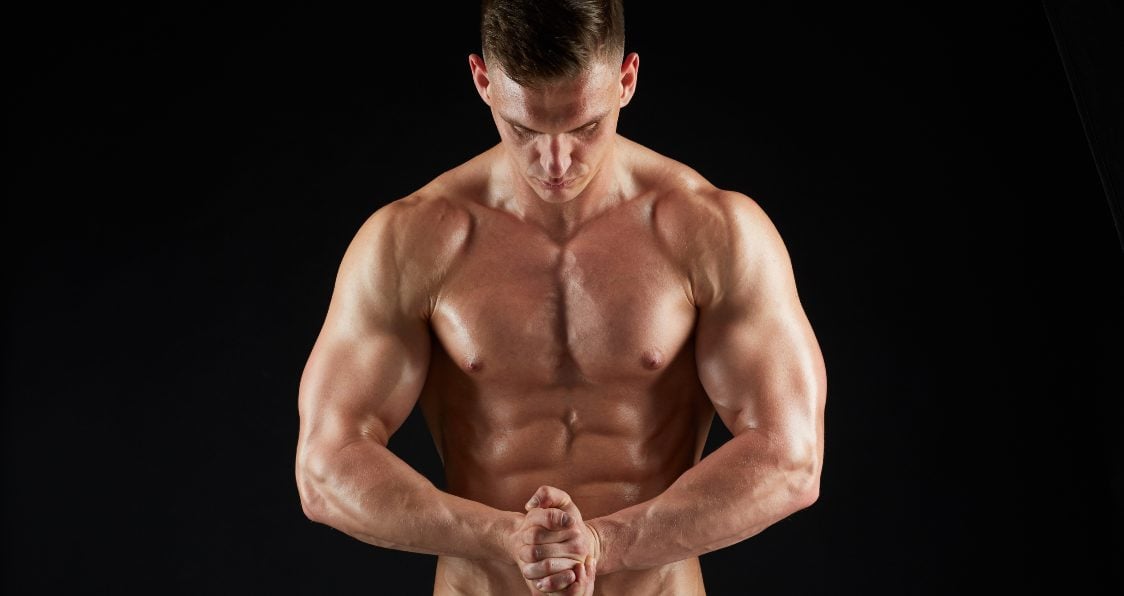
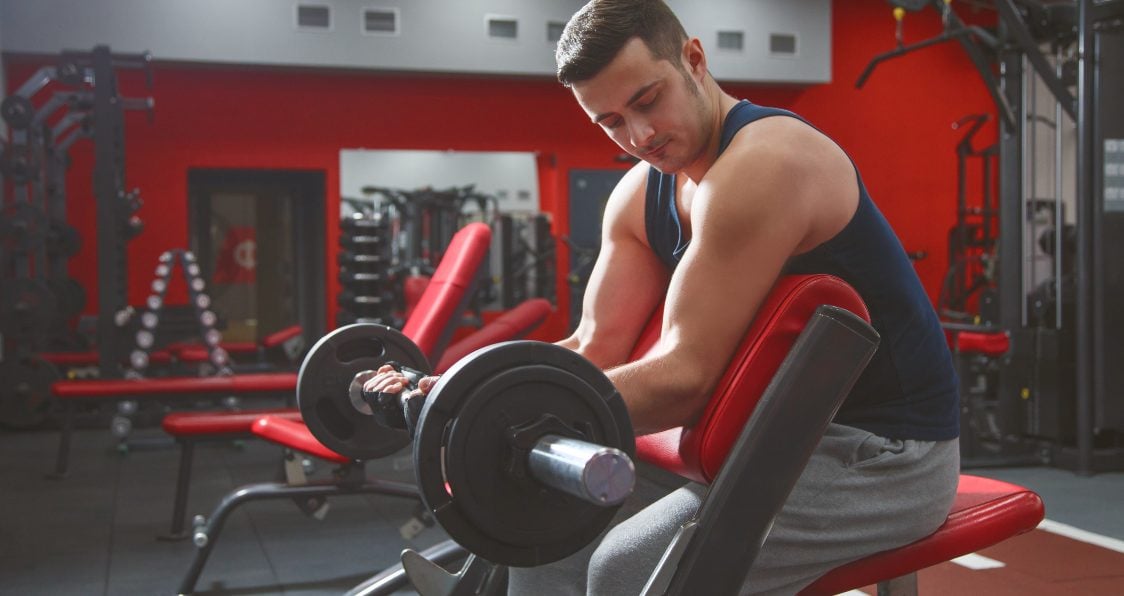
Beef up your biceps with this great isolation exercise.
Our biceps are muscle we all love to see grow and an exercise like single arm cable curls is exactly what you need. An isolation exercise perfect for seeing muscle growth can take your gains to new heights and give you the best chance at seeing real success. With so many biceps exercises, the ability to see gains is something we all know and love, but knowing the right approach can make all the difference. Plus, taking advantage of a cable machine can take you a long way in the gym.
Strong arms are important for pulling movements associated with sport and training while also giving us functional gains. Able to support surrounding muscles, those lacking in bicep strength will suffer when it comes to producing overall gains. On top of that, large biceps will make others envy you in the gym as you rock that sleek tank to show off your aesthetic. Single arm cable curls are the perfect exercise to focus on gains and allow you to train at peak performance.
Let’s jump into the single arm cable curl exercise and see what this is all about. From what it is, to muscles worked, the many benefits, and how to perform this, we’ll also share some great alternatives and exercises to pair with so you can structure a complete and well-rounded workout.
What Is The Single Arm Cable Curl Exercise?
The single arm cable curl is a fantastic isolation exercise to build muscle and isolate out those biceps for serious growth. The benefit to this exercise is that you can work just the bicep to increase strength, size, fix imbalances, and work on mind-muscle connection. Using the cable pully forces you to increase time under tension and a comfortable handle can make this exercise easier. A beginner level exercise, this is great for all athletes of all experience levels to see serious gains.
Muscles Worked
The muscles worked in this exercise are your biceps as this is a great isolation exercise. Working to build your biceps allows for better support of those surrounding muscles while also enhancing strength and size where you want. To get more specific, what you work are your biceps brachii, brachialis, and brachioradialis. You really won’t find any secondary muscles with this exercise, however, your forearm muscles will get work done as a result of grip and the necessary movement of performing this specific exercise.
Benefits Of The Single Arm Cable Curl
The benefits of this exercise are hard to ignore and should be a staple in your arm day routine. If this isn’t, then definitely consider an alternative of it for this and anything close can give your biceps the growth you want most. With amazing benefits, the single arm cable curl is a muscle builder and results changer.
Benefits of the single arm cable curl include:
Increase strength and size: By working just your biceps with this isolation exercise, you give yourself a great chance to increase strength and size for sport specific and functional movements (1).
Round out your arm aesthetic: Giving your arms a more rounded look, this will add to an already buff aesthetic.
Fix muscle imbalances:Muscle imbalances are a pain but working each bicep separately can give you great benefits for evening out that size (2).
Enhance mind-muscle connection: Work to increase mind-muscle connection with proper form and the ability to focus on more time under tension (3).
Easy to perform: A beginner level exercise, this is easy to perform and will produce gains.
Plenty of variations: With great variations of it, you can work those muscles to see similar growth but also challenge and diversify your workouts.
How To Perform This Exercise
Here are the steps for performing the single arm cable curl:
Set up the cable attachment onto the pulley machine and choose your desire weight.
Standing with your feet about hip width apart, grab the handle with an underhand grip and get in a comfortable position.
Engage your core, keep your back neutral, and make sure your elbow is tucked at your side as you slowly curl the weight.
Give a good squeeze at the top and gently lower back to the starting position.
Repeat for your desired number of sets and reps.
Single Arm Cable Curls Variations
Despite the effectiveness of the single arm cable curl, there are other exercises that can beef up your gains while also diversifying your workout. The nice part about variations are they can offer the same gains by working your muscles differently, but also challenge you in different ways to avoid any plateaus. So, while single arm cable curls are great, let’s look at some alternatives:
Rope Curls
Single Arm Dumbbell Curls
Hammer Curls
Machine Bicep Curls
Resistance Band Curls
Best Exercises To Pair With Single Arm Cable Curls
In efforts to structure a great workout, knowing what exercises pair well with single arm cable curls can take you a long way. For sticking with the cable machine, you can perform a nice upper body routine including triceps pushdowns and cable reverse flys to add in your triceps and shoulders to the mix. If you want to stick with an arm day punisher, mix in dumbbell curls and preacher curls to fire up those biceps for serious strength gains.
Wrap Up
Single arm cable curls are the perfect isolation exercise to help you produce effective gains. Our biceps are muscles we love to see grow and by adding in an easy to perform yet highly efficient exercise, those gains will come in no time. Plenty of benefits, proper form, and the right exercises to pair with it will give you a physique others will envy and one you will love. Give single arm cable curls a try, take advantage of the cable machine, and watch those gains take off today.
Let us know what you think in the comments below. Also, be sure to follow Generation Iron on Facebook, Twitter, and Instagram.
*Images courtesy of Envato
References
Mangine, G.; et al. (2015). “The effect of training volume and intensity on improvements in muscular strength and size in resistance-trained men”. (source)
Kim, T.; et al. (2015). “Effects of specific muscle imbalance improvement training on the balance ability in elite fencers”. (source)
Calatayud, J.; et al. (2016). “Importance of mind-muscle connection during progressive resistance training”. (source)
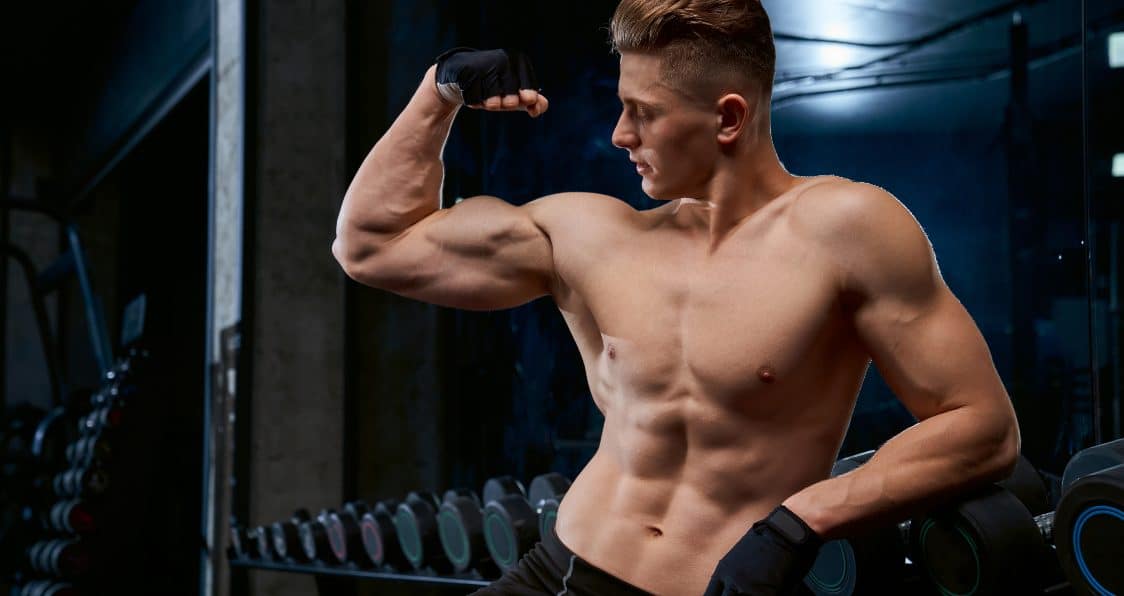
Build those bigger biceps for a seriously buff physique with this isolation exercise.
We all want those bigger biceps and know plenty of exercises to help get us there, but one exercise in spider curls may be an elusive one. We all know those popular exercises associated with arm growth being alternating dumbbell curls, concentration curls, barbell curls, and a host of other more popular biceps exercises great for seeing gains. But spider curls have the ability to isolate and really build those bigger, more buff biceps to only aid in that massive physique.
With so many exercises out there, it can often times be hard to choose the right from the wrong- the most efficient one vs. those which will just waste time. But with spider curls, you get an engaging exercise with minimal equipment needed able to provide for a host of gains to make others seriously envy you and your bigger, more buff physique.
Let’s take a look at spider curls and see what this exercise is all about. Form what it is, to muscle worked, the many benefits, and of course, how to perform it, you will be well on your way to seeing those gains you want most. Plus, with the right equipment, there’s no excuse to ever have a bad workout again.
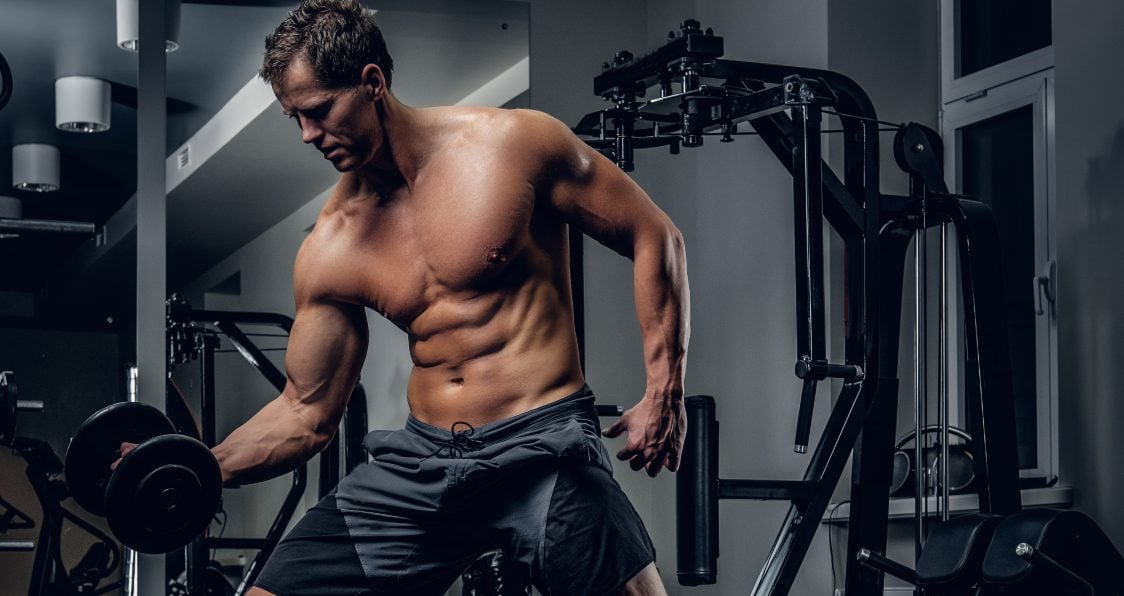
What Are Spider Curls?
Spider curls are an isolation arm exercise with a beginner difficulty level, given the fact it is relatively easy to learn. The only equipment needed is an incline bench and weights, being a barbell or dumbbells. What this exercise can do is really build up strength and size in your biceps, and by isolating them, along with your forearms and other secondary muscles, spider curls give your muscles no choice but to grow. It is best to perform this exercise towards the end of your workout, especially after a heavier lift as this will work to fatigue your muscles further.
Muscles Worked
The spider curl works your biceps and forearms in a way that gives them no choice but to increase in size. The main muscles worked are your biceps brachii, with your brachioradialis, brachialis and forearm flexors getting great secondary work done. Spider curls work to really isolate these muscles to force them to have extra time under tension for that increased growth.
Benefits Of Spider Curls
The benefits of spider curls are hard to ignore, especially when you place these towards the end of your workout as a great finisher exercise. If you are looking for an effective exercise to provide for serious pumps and efficient gains, then spider curls are the way to go.
Benefits of spider curls include:
Increase muscle growth: By working with real weight and increased range of motion, your muscles have no choice but to grow, especially with an increased emphasis on fatiguing them (1).
Better range of motion: Really work for increased time under tension with better range of motion to build muscle and feel like you’re getting great work done (2).
Build better symmetry: Us bodybuilders need the best in terms of muscle symmetry and by working each muscle on its own, you can play with size and build that perfect physique.
Effective finisher workout: For those looking to really push growth and bring your muscles to total fatigue, this is an effective finisher workout, especially after a heavier exercise.
Nice biceps curl variation: This exercise gives you a good excuse to change up the traditional biceps curl exercise.
How To Perform Spider Curls
Here are the steps for performing the spider curl:
Lay on a bench at an incline of around 45-degrees. Your abs will be pressed against the backrest and the top of the bench will be around arm-pit height.
Take a dumbbell in each hand with your palms facing forward.
When ready, bend your elbows and curl the weight towards your shoulders, really giving a good squeeze at the top.
In a controlled movement, lower back to the starting position.
When it comes to building those massive arms, having the right equipment is imperative and can greatly affect all your gains. With the right dumbbells or barbell, combined with a great bench, you will effectively work those biceps with the spider curl to build those bigger, more buff biceps.
Bowflex SelectTech Dumbbells adjust from 5 to 52.5 lbs. and allow for quick switching. With 15 sets of weight in one, the unique dial system works perfectly for convenience.
Bowflex SelectTech Dumbbells offer adjustments from 5-52.5 lbs. with 2.5 increments so you can progress efficiently and have a quality workout. The ability to rapidly switch from one exercise to the next saves you time and space by combining 15 sets of weight into one. The unique dial system works great and totally eliminates the need for many dumbbell sets for better convenience and overall space.
American Barbell 20KG Training Bar is a versatile barbell that is rigorously tested for training and competition. A precision ground alloy steel shaft ensures quality, durability, and longevity.
American Barbell 20KG Training Bar is a versatile bartested and approved for training and competition. The precision ground alloy steel bar shaft is tested through a rigorous process to ensure longevity and excellent whip for optimal performance. A finished hard chrome adds extra durability and corrosion resistance for nice added features. The bar sleeves work to rotate smoothly and this bar is 20kg, 28mm in diameter, and 2,200mm in length. This bar is built to last while providing comfort and longevity for all of your goals.
Check out our list of the Best Barbells for more great lifting products!
The Force USA MyBench completes the list of items you need to complete spider curls. This is a great option to add to your equipment, as the Force USA MyBench adjusts quickly and easily from Flat to Incline to Decline thanks to Force USA’s laser cut, shark tooth design.
Wrap Up
Spider curls are the perfect exercise to see increased growth to give you bigger, more buff biceps. At the end of the day, you need an exercise that will be engaging and effective. With so many biceps exercises out there, working to confuse your muscles can be challenging but it is possible. Give spider curls a try and really see how an efficient biceps workout can give you that buff aesthetic others will envy.
Generation Iron may receive commissions on purchases made through our links. See our disclosure page for more information.
Let us know what you think in the comments below. Also, be sure to follow Generation Iron on Facebook, Twitter, and Instagram.
*Images courtesy of Envato
References
Mangine, G. (2015). “The effect of training volume and intensity on improvements in muscular strength and size in resistance-trained men”. (source)
Pinto, R. (2012). “Effect of range of motion on muscle strength and thickness”. (source)
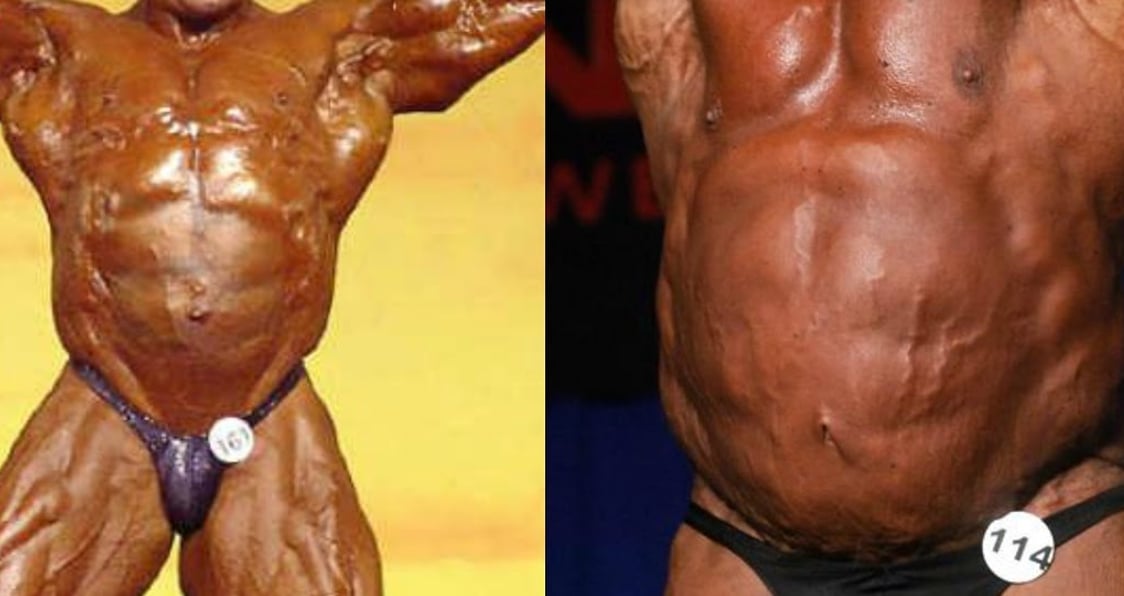
The Reason for Abdominal Distention and How Bubble Gut Affects Bodybuilders
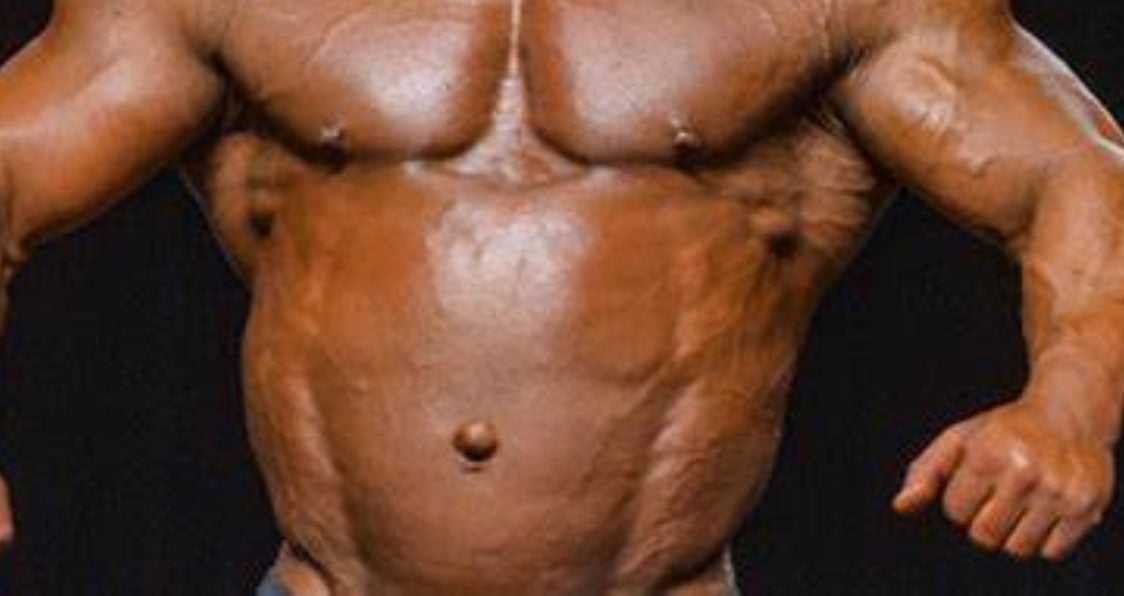
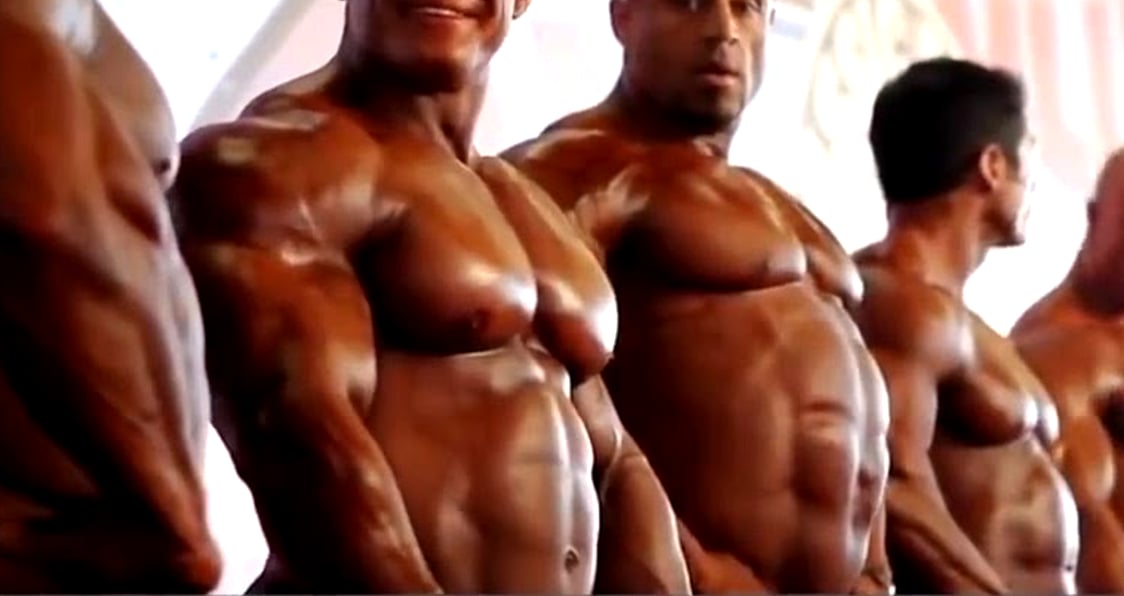
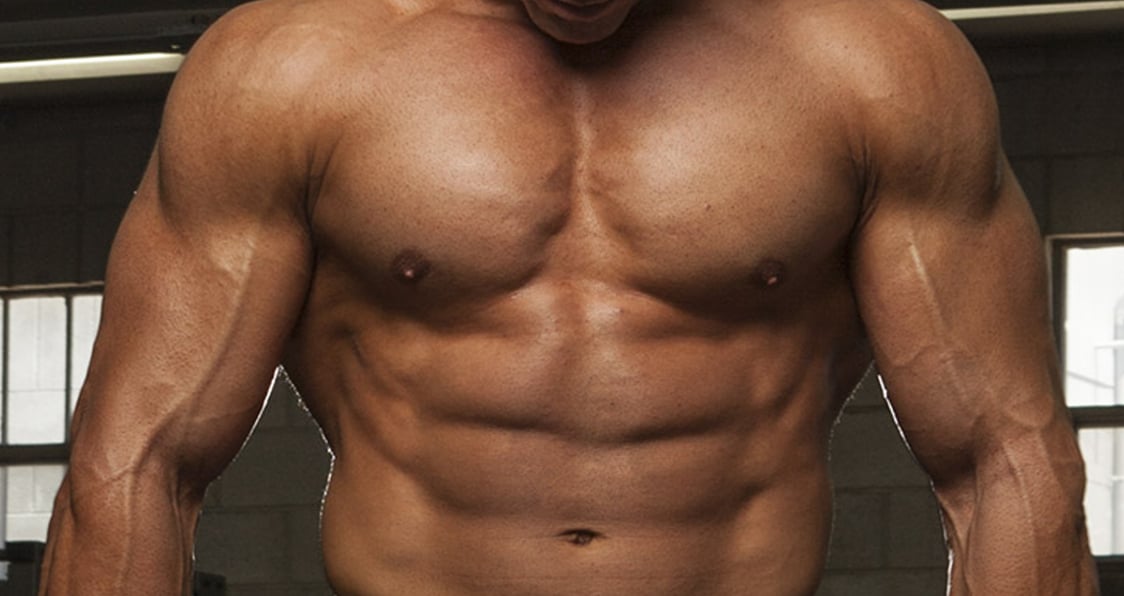
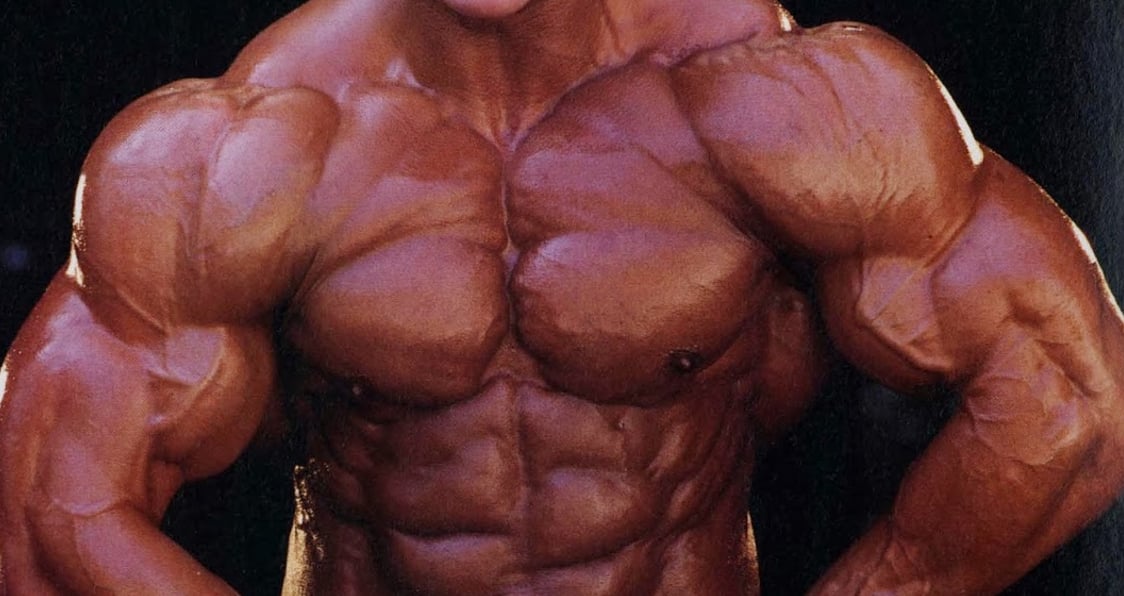
Anyone following professional bodybuilding will have noticed the rising trend of stomach distention in bodybuilders, particularly in recent history. The trend has become even more pronounced over the last decade or so, with images of Mr. Olympia contestants like Kai Greene or Phil Heath, and even previous champions like Ronnie Coleman showing signs of excessive abdominal distention despite having extremely low body fat.
Many spectators and fans of the sport have been left wondering what causes the appearance of a ‘bubble gut’ in these athletes and why has it unfortunately become so common within bodybuilding. Stomach distention has become known as a variety of names in bodybuilding circles. It can be referred to as “HGH gut” or “insulin gut,” or more simply, “bodybuilder belly” and “muscle gut.” As these names suggest, the abdominal distention in bodybuilders is believed to be caused by substances such as insulin and human growth hormone (HGH) abuse.
Let’s dive into the HGH “bubble gut”. We will be going over why bodybuilders are willing to go through this in order to achieve their desired results. Does the human drive to win outweigh the health consequences of something like bubble gut? We’ll check this out and see why this is such a big deal, especially for bodybuilders at the top of their game. We’ve all seen it, so let’s find out what it is, what causes it, and ways to prevent it to avoid that bloated, rounded physique.
Anatomy Of The Abdomen
The human abdomen can be broken down into 3 layers. There is the musculature including the rectus and transverse abdominis and the internal and external obliques. These are of course essential for providing balance and stability during those massive lifts. They also are responsible for popping out to give you an absolutely shredded aesthetic people will envy.
Then there is the fascia involved. This is basically a casing for the muscles to sit in that offers protection and connects your skin to the tissue that is directly underneath it.
But deeper is the extra-peritoneal fat, omentum, and the actual organs inside the peritoneum. This is the real stuff we want to protect, but using exogenous HGH and other anabolic substances can greatly affect what we seek to so desperately keep healthy and intact.
What Is Abdominal Distention & Bubble Gut?
Abdominal distention occurs when substances, like air or fluid, accumulate in your abdomen. This can cause the expansion of the stomach to move beyond a normal level, being your waist. In bodybuilders, this is known as bubble gut, and it gives off the appearance that they have excess fat and heavy bloating around the gut (1). We’ve all seen it.
Although they still have those six-pack abs popping through, the mid section is very much rounded out leaving us wondering just what is going on. Well, it is the effects of HGH and other substances bodybuilders use to get that extra leg up on the competition.
While it may seem to work in terms of packing on size, it certainly doesn’t look as good as a leaned out flat stomach.
Causes of Abdominal Distention In Bodybuilders
When it comes down to it, knowing what causes bubble gut will prove to be important when looking to avoid it. Common causes of bubble gut include:
Human Growth Hormone (HGH) abuse: A common side effect is excessive growth of certain tissues and this can really make that stomach bulge pronounced.
Insulin Abuse: Typically stacked with HGH. Insulin can increase fat storage behind the stomach giving off that rounded look.
High Calorie & Carb Diets: Those on high calorie diets most likely have food staying in their stomach for longer periods of time. As for those with high carb diets, the increase in glycogen increases water retention and this can offer a bloated look.
HGH & Effect On The Abdomen
When combined with proper training, multiple supplements, and a diet that is extremely high in quality protein, the use of insulin and human growth hormone leads to considerable and significant increases in muscle mass. This causes an increase in mass in the rectus abdominis, or “the six pack” musculature itself. It also in the muscles that lie underneath it, including the muscular layer of the abdomen.
The combined growth of these muscles in turn causes the entire midsection to grow and eventually protrude. This is what gives a ‘blocky’ appearance and contributing to abdominal distention. Many bodybuilders also combine HGH, along with other substances, with insulin use – a practice known as “stacking” – which can further increase these effects.
Over time, insulin use can cause increased fat storage behind the abdomen. This is known as visceral fat contributing to the omentum, which can also contribute to a larger abdomen. With plenty of androgens and Insulin-like Growth Factor floating around in the circulation, internal organs can also be affected. Like muscles, they also have receptors for these hormones albeit in lower concentrations than skeletal muscle.
Why Bodybuilders Still Use HGH
Despite the unfortunate side effect of bubble gut, bodybuilders continue to use HGH and other substances. For many, the obvious choice would be to stop using such substances as they will only hurt in the long term. However with such a competitive mindset, it just isn’t that easy. What HGH use does is increase muscle mass, enhance bone density, promote better performance, and offer less body fat. Now, as a bodybuilder, that sounds pretty good.
The mindset around simply dealing with the repercussions in order to compete at the highest levels seems simple. But at the end of the day, bubble gut comes back to haunt many. Using HGH and other substances to gain that extra edge is proving to be more detrimental than originally thought. Don’t let you hard work slip away with a rounded, bloated physique come competition day. The drive to win is great but getting there efficiently, safely, and in a healthy way is more important than just taking the victory as is.
How To Prevent Bubble Gut
Bubble gut is not necessarily one isolated problem, especially for those in the bodybuilding community. Let’s say you take HGH and insulin, but also are working with a high carb diet as you look to bulk up. Right there are three things potentially causing your bubble gut, so working in tandem to make those changes is important, especially as we seek to see some real changes that we want most. Some ways to avoid and prevent bubble gut are:
Limit HGH and insulin use:
As you get closer to competition and performance time, start to taper off your use of these substances. Since they will continue to help you bulk as you get closer to competition time, you want to be shredded, not rounded. Work to limit the use and avoid gut distention.
Reduce carb intake:
This seems like a relatively easy fix and will help you avoid bloating and bubble gut. Your intake of protein can be high. Work to lower the carbs a bit. With higher protein intake, you will feel more full and work to boost that muscle growth anyway.
Try other forms of dieting:
This may help your body adapt better to these sudden changes and something like intermittent fasting can greatly affect your ability to cut. By limiting your caloric intake and doing so safely, you give yourself the best chance at seeing those desired changes while doing so in a safe and healthy way.
Fat-Burning Supplement:
Bodybuilders can use a quality Fat Burner and a muscle builder supplement that mobilizes whatever body fat they have left, increases metabolism so it burns off, yet protects muscle. Utilizing a Fat Burner with Hydroxy ß-Methylbutyrate (HMB) during a cut, can help carry on shedding fat. It can also help protect that hard-earned muscle. Most fat-burning supplements focus on things like thermogenesis and fatty acid mobilization, which makes sense.
Wrap Up
Abdominal distention, or bubble gut, is a wild phenomenon that makes us question just what is going on. But there is an easy answer and potential fix if a bodybuilder so chooses to partake. Using HGH and insulin, while matched by a high calorie or high carb diet, can simply cause problems that you just don’t want or need. That massive physique is already big enough and bubble gut can give off an appearance of stored fat or bloating. No bodybuilders wants that. Looking at ways to change these habits can help you avoid bubble gut. Then you won’t have to deal with that rounded physique once competition time rolls around. On top of that, your overall health and wellness will greatly improve.
Let us know what you think in the comments below. Also, be sure to follow Generation Iron on Facebook, Twitter, and Instagram.
References
Malagelada, Juan R.; Accarino, Anna; Azpiroz, Fernando (2017). “Bloating and Abdominal Distention: Old Misconceptions and Current Knowledge”. (source)
Harvard Health Publishing (2018). “Growth hormone, athletic performance, and aging”. (source)
Lacy, Brian E.; Cangemi, David; Vazquez-Roque, Maria (2021). “Management of Chronic Abdominal Distention and Bloating”. (source)
Often referred to as “calorie cycling”, this diet is a powerful technique.
For many of us, finding a diet and hopping onto it can be one of the most challenging things. Time and time again, we are able to last about three days before someone offers you a beer, or those candy bars stare at you while you wait in line at the grocery store. And just like that, the diet is no more.
With so many ways to diet, and of course those infamous fad diets, even finding the right technique can be overwhelming, leaving you in a pit of despair and pizza. But we’re here to bring you a potentially amazing dieting technique in the zig zag diet that could quite possibly change things around for you.
Let’s say you get past the first couple weeks of your new diet. You’re cruising along, seeing great gains, and then a sudden speed bump stands right before. You try and try but can’t seem to get over that hurdle. This dreaded plateau that can happen in weightlifting can happen just as much in dieting and can be soul crushing.
It can make you question just how hard you’re willing to work, how resilient you are to adversity, and how much you wish you could just drop those pounds. But the zig zag diet is a great technique to burst through any plateau so you never falter when it comes to your progress.
Let’s jump into the zig zag diet and see what this technique is all about. You deserve to have the best chance at growth and your diet is a great place to start.
What Is The Zig Zag Diet?
The zig zag diet, also known as calorie cycling, is a great dieting technique that forces you to change and alternate the amount of calories you consume on a given day to really promote growth and weight loss. By changing the amount of calories you consume on a given day, you start to avoid those dreaded plateaus that can be an unfortunate side effects of constant calorie diets (1).
Typically, your days consists of those low, medium, or high calorie days, each with their own respective benefits to help you get to where you want to be. Your low days are meant to maximize the amount of fat burned so you start to see some real gains to weight loss. Those medium calorie days will work to maintain and build muscle, especially if you are active and workout during this time. Those high calorie days will boost your metabolism to burn it off and refill energy stores for future days so you no longer feel sluggish or depleted.
For those looking to avoid plateaus, the zig zag diet is right for you. Depending on your fitness level, the amount of calories per day will certainly change but you need to be make sure you have adequate amounts of fuel to carry you through your daily life.
Benefits Of The Zig Zag Diet
The zig zag diet does consist of a few great benefits worth noting as you consider making this lifestyle change for yourself. Benefits include:
Avoid plateaus: Don’t worry about hitting those dreaded plateaus that constant calorie diets follow.
More muscle: Work to maintain and build muscle so you don’t sacrifice current gains and those you continue to make in the gym.
Less fat: With your metabolism working overtime, you will work to shed that fat and really give yourself a chance at a lean physique.
Metabolic confusion: Test your metabolism and see just what it can do when you need it to work for you by consistently changing up the amount of calories your body processes (2).
Easily adjustable: Depending on your activity level, this is easily adjustable and can be done using calculations based on your information and amount of activity you perform.
How This Diet Works
We’ll offer an example of what a typical day may look like. While you will still be eating quality and nutritional food, you are changing the amount of calories on a given day. Ensuring enough protein is in your diet is huge, but you can cycle with carbs. Here is an example of what the numbers look like (always adjust calories to you and your lifestyle).
Monday: 1,800
Tuesday: 2,000
Wednesday: 1,800
Thursday: 1,600
Friday: 2,000
Saturday: 1,800
Sunday: 2,000
How The Zig Zag Diet Can Break A Plateau
The zig zag diet can work to break through any plateau because it requires you to zig zag your way around calories and the amount that you consume. This will cause metabolic confusion which can be helpful in the long run especially when it comes to burning off calories. By kicking your metabolism into gear, you work to lose weight while still maintaining and potentially gaining muscle mass (3).
Is It Worth It?
Dieting can be very subjective and what works for one person may not work for someone else. The zig zag diet ultimately is a safe and effective way to lose weight given that it requires you to eat healthy foods, with the right amount of calories per day (even if a day or two are slightly lower), and maintain control so you don’t diet the wrong way. Effective for bursting through plateaus, the zig zag diet is worth it, especially when it comes to staying on track and not falling victim to the dreaded dieting lull, which often times leads to you reverting back to old habits.
Wrap Up
The zig zag diet, or calorie cycling, is a great dieting technique to help break dieting plateaus and keep you on track. We all know dieting can be hard so why not set ourselves up for success with a worthwhile and effective technique that can really work to boost our gains. Check out the zig zag diet today and really see what it can do for you. When done right, you won’t be disappointed with the results.
Let us know what you think in the comments below. Also, be sure to follow Generation Iron on Facebook, Twitter, and Instagram.
*Images courtesy of Envato
References
Howell, Scott; Kones, Richard (2017). “‘Calories in, calories out’ and macronutrient intake: the hope, hype, and science of calories”. (source)
Patterson, Ruth E.; Laughlin, Gail A.; Sears, Dorothy D.; LaCroix, Andrea Z.; et al. (2015). “Intermittent Fasting And Human Metabolic Health”. (source)
Freire, Rachel (2020). Scientific evidence of diets for weight loss: Different macronutrient composition, intermittent fasting, and popular diets”. (source)
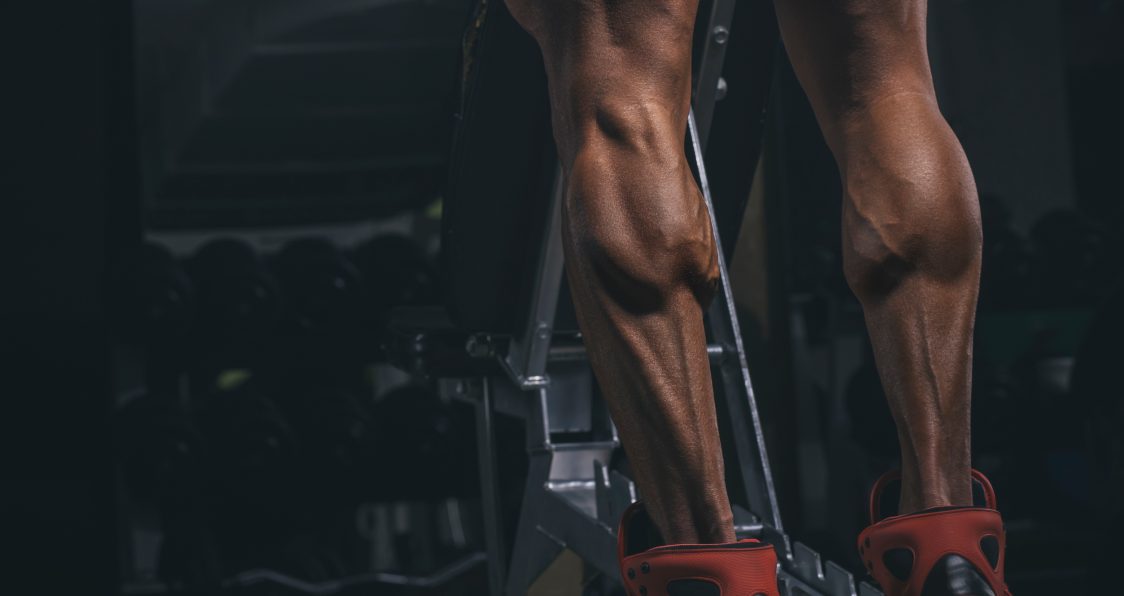
Large and defined legs are what separate men from the boys. Legs are also one of the most undertrained muscle groups, yet they provide some of the greatest benefits for someones physique. Training legs provides stability, hormonal benefits, and a better overall aesthetic. However, while quads and hamstrings seem to respond fairly well to training in many people, for most people, calves are at the top of the most stubborn muscle groups list when it comes to seeing improvements. You will need to do something special if you’re lacking in the calf department.
Big legs without big calves are like big arms without forearms, it just does not look right. Even worse, guys with a muscular upper body and toothpick legs are an easy target for insults, and this is something you can avoid. We’re sure you wouldn’t want to be on the receiving end of these humiliations. Follow these tips and see considerable growth in your calves.
Training Your Calves
When it comes to training your calves, there are plenty of methods we will get into. However, we do want to address that you almost need to overtrain your calves, as they are utilized every day when you are walking around, going up stairs, and so on, so they are used to taking a beating. Realistically, calves are a muscle that you can train every day. That being said, you need to hit them hard to see growth, so let’s get into these tips to turn your calves into bulls.
Use Variations of Calf Raises
If you have weak calves, performing three sets of standing calf raises on the smith machine at the end of your leg workouts isn’t going to do much for you. You need to be constantly shocking your calves, pretty much straight up abusing them, in order for them to grow.
Your calves are made of two muscles; gastrocnemius and soleus. A single calf raise exercise won’t target both these muscle groups, so you need to have variations in your workouts to develop both of these muscles.
The gastrocnemius is the longer calf muscle and is trained when you perform standing calf raises. The soleus is the shorter muscle and is trained by seated calf exercises. You need to have your knees locked out to train the gastrocnemius muscle and soleus is worked when your knees are in more of a bent position.
Like the triceps, your calves are made of three heads; outer, inner and medial. You can target each of them individually and effectively by modifying the placement of your feet. Place your toes close to each other with the balls of your feet flared out to target the outer heads.
Keeping your toes at shoulder width with the balls of your feet placed together will target the inner heads. Performing the calf raises with a normal stance where your feet are parallel to each other will target the medial heads.
Train Your Calves at the Beginning of Your Workouts
Most people train their calves at the end of their workouts, after they are already fatigued and do not want to spend any more time in the gym. If you have weak calves, you need to train them at the beginning of your workouts while you’re still fresh and full of energy. Your quads, hams, and glutes are big muscle groups and will exhaust you before you get to training your calves, making your calf training lack the intensity that it should have.
Since your calves are relatively smaller muscles that you use every day of your life, they are used to the constant stress and take lesser time to recover. You can train your calves 2-3 times a week. Schedule your calf workouts so you have at least 48 hours between your workouts.
Full Range of Motion to Stretch the Calves
Majority of the people make the mistake of limiting their range of motion while training their calves. Maintaining a full range of motion is the trick to developing the size of your calves.
Stand on an elevated platform like an aerobic step or weight plates with your toes on the platform and your heels off of it. At the bottom of the movement, the balls of your feet should be an inch away from touching the floor. Try mimicking a ballerina on her toes while you’re at the top of the movement. Hold and squeeze the living hell out of your calves at the top of the movement.
You Don’t Need a Lot of Weight
Many people let their egos get the better of them, and you will see them with countless plates loaded up on the smith machine, or the full stack on the calf raise machines. While we respect the weight, it is not necessary. For these people loading up hundreds and hundreds of pounds to hammer their calves, the range of motion while training calves are limited. You do not need to lift the heaviest possible weights while training calves as compared to the other muscles.
A lot of the people load the machine with more weights than they can handle and their motion is restricted to a couple of inches. However, despite not needing massive amounts of weight, you do not want to treat your calves like babies. Load up a good amount of weight that will strain your muscles, but you can still get a good range of motion and contraction with, really focus on the mind muscle connection.
If you’re just starting out or if you have lagging calves, you can perform bodyweight calf raises. Change up the intensity frequently to see the best results.
Calf Workout
Bodyweight Standing Calf Raises – 1 Set 100 Reps
Seated Calf Raises – 3 Sets 30 Reps (Perform 10 reps each with the three feet placement variations)
Weighted Standing Calf Raises – 3 Sets 10 Reps
Calf Training Wrap Up
Overall, training your calves is just as necessary to your physique as training the rest of your muscle groups. Lagging calves make for a lackluster physique, and they just do not look right.
How often do you train your calves? Let us know in the comments below. Also, be sure to follow Generation Iron on Facebook and Twitter.
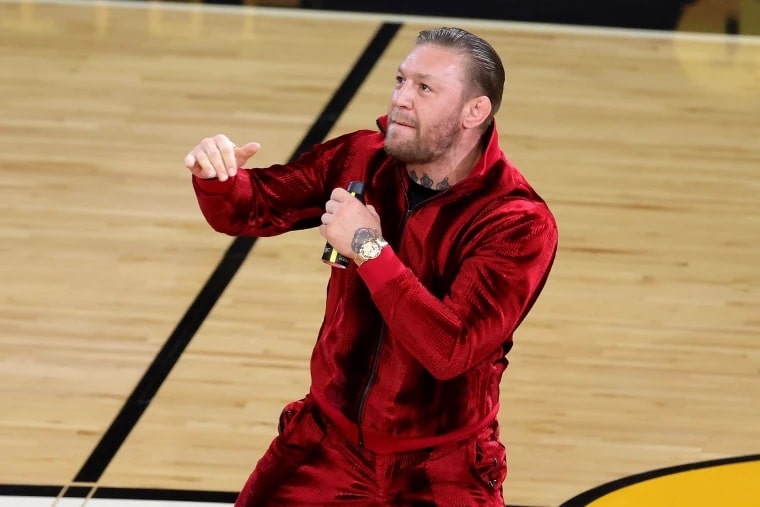
Conor McGregor denies allegations made against him.
UFC star Conor McGregorhas been accused of sexual assault and attempting to rape a woman during Game 4 of the NBA Finals. According to reports by TMZ, the incident allegedly took place in a bathroom at the Kaseya Center in Miami.
McGregor was present during Game 4 between the Miami Heat and Denver Nuggets to be apart of an in-game skit to promote a pain-relief spray. The entertainment went wrong as Burnie, the Heat mascot, was sent to the hospital after being punched twice by McGregor.
TMZ has obtained demand letters from attorney Ariel Mitchell. McGregor has denied all allegations.
According to letters, the woman was separated from her friend by Heat and NBA security. She was forced into the bathroom where McGregor was waiting in a stall. The security guards then waited outside where they stopped anyone else from entering the bathroom.
Megan Briggs/Getty
The letters obtained by TMZ claim that McGregor aggressively kissing the woman and attempting to rape her before she was able to get away by throwing a few elbows. The woman left in a hurry and left her purse behind, which the letters allege security “held hostage.”
Reports say the woman pleaded with security to get her purse back. She then reported the incident to authorities on Sunday.
TMZ also reports that reps for McGregor made a statement on Thursday morning claiming that the “allegations are false.” They also said that “Mr. McGregor will not be intimidated.”
UFC has been made away of the allegations and is continuing to get all information.
“UFC will allow the legal process to play out before making any addition statements,” according to reports.
The World’s Heaviest Man diet consisted of three gigantic meals and two snacks.
YouTuber Erik Lamkin, known as EriktheElectric, has taken on many eating challenges in his social media platforms. Recently, Lamkin took on the 22,000-calorie diet of former world’s heaviest man Walter Hudson.
Lamkin has built a following on YouTube of 2.5 million subscribers. He gave himself 24 hours to complete the massive day of eating that consisted of three meals and two snacks. Walter Hudson holds the record for largest waist at 119 inches and at his heaviest, weight 1,200 pounds.
This would be no small challenge as Lamkin began his day with breakfast.
ErikTheElectric YouTube
Meal 1 – 8,690 calories
The massive breakfast began with Lamkin combining the eggs and toast. Once the dozen eggs were gone, he crushed the sausage and moved onto the bacon. The toast was eliminated by making jelly sandwiches. Lamkin even added some peanut butter to mix it up a bit.
12 eggs
1 pound bacon
32 sausage links
1 loaf bread with grape jelly
1 pot of coffee
Snack – 1,540 calories
The snacks were described as a “handful” of candy bars. While there was no exact amount, Lamkin narrowed it down to between 3-6. He used a random number generator to determine the amount he would eat. The first snack consisted of four candy bars.
Reese’s Fast Break
Hershey’s Cookies & Cream
Reese’s Big Cup
Fruity Pebbles Candy Bar
ErikTheElectric YouTube
Meal 2 – 4,820 calories
For lunch, Lamkin was tasked with two large sandwiches from Subway and a pound of fries. He opted for the Philly cheesesteak sandwich, which he gave a perfect rating. The second large sandwich was the classic chicken rotisserie sandwich. Lamkin was unable to finish the full bottle of soda so carried it over to his second snack.
2 liter bottle of soda
2 large sandwiches
Pound of fries
Snack – 1,690 calories
The second snack of the day consisted of more candy bars. The umber generator added one this time and Lamkin chose five different bars.
Zero candy bar
Snickers
3 Musketeers
Caramello bar
Butterfinger
ErikTheElectric YouTube
Meal 3 – 6,065 calories
Dinner would be the most challenging meal of the day with plenty of protein and starches mixed in. Lamkin began by taking down four ham steaks and six cobs of corn. He moved onto the potatoes but had to finish one of them later, along with the apple pie.
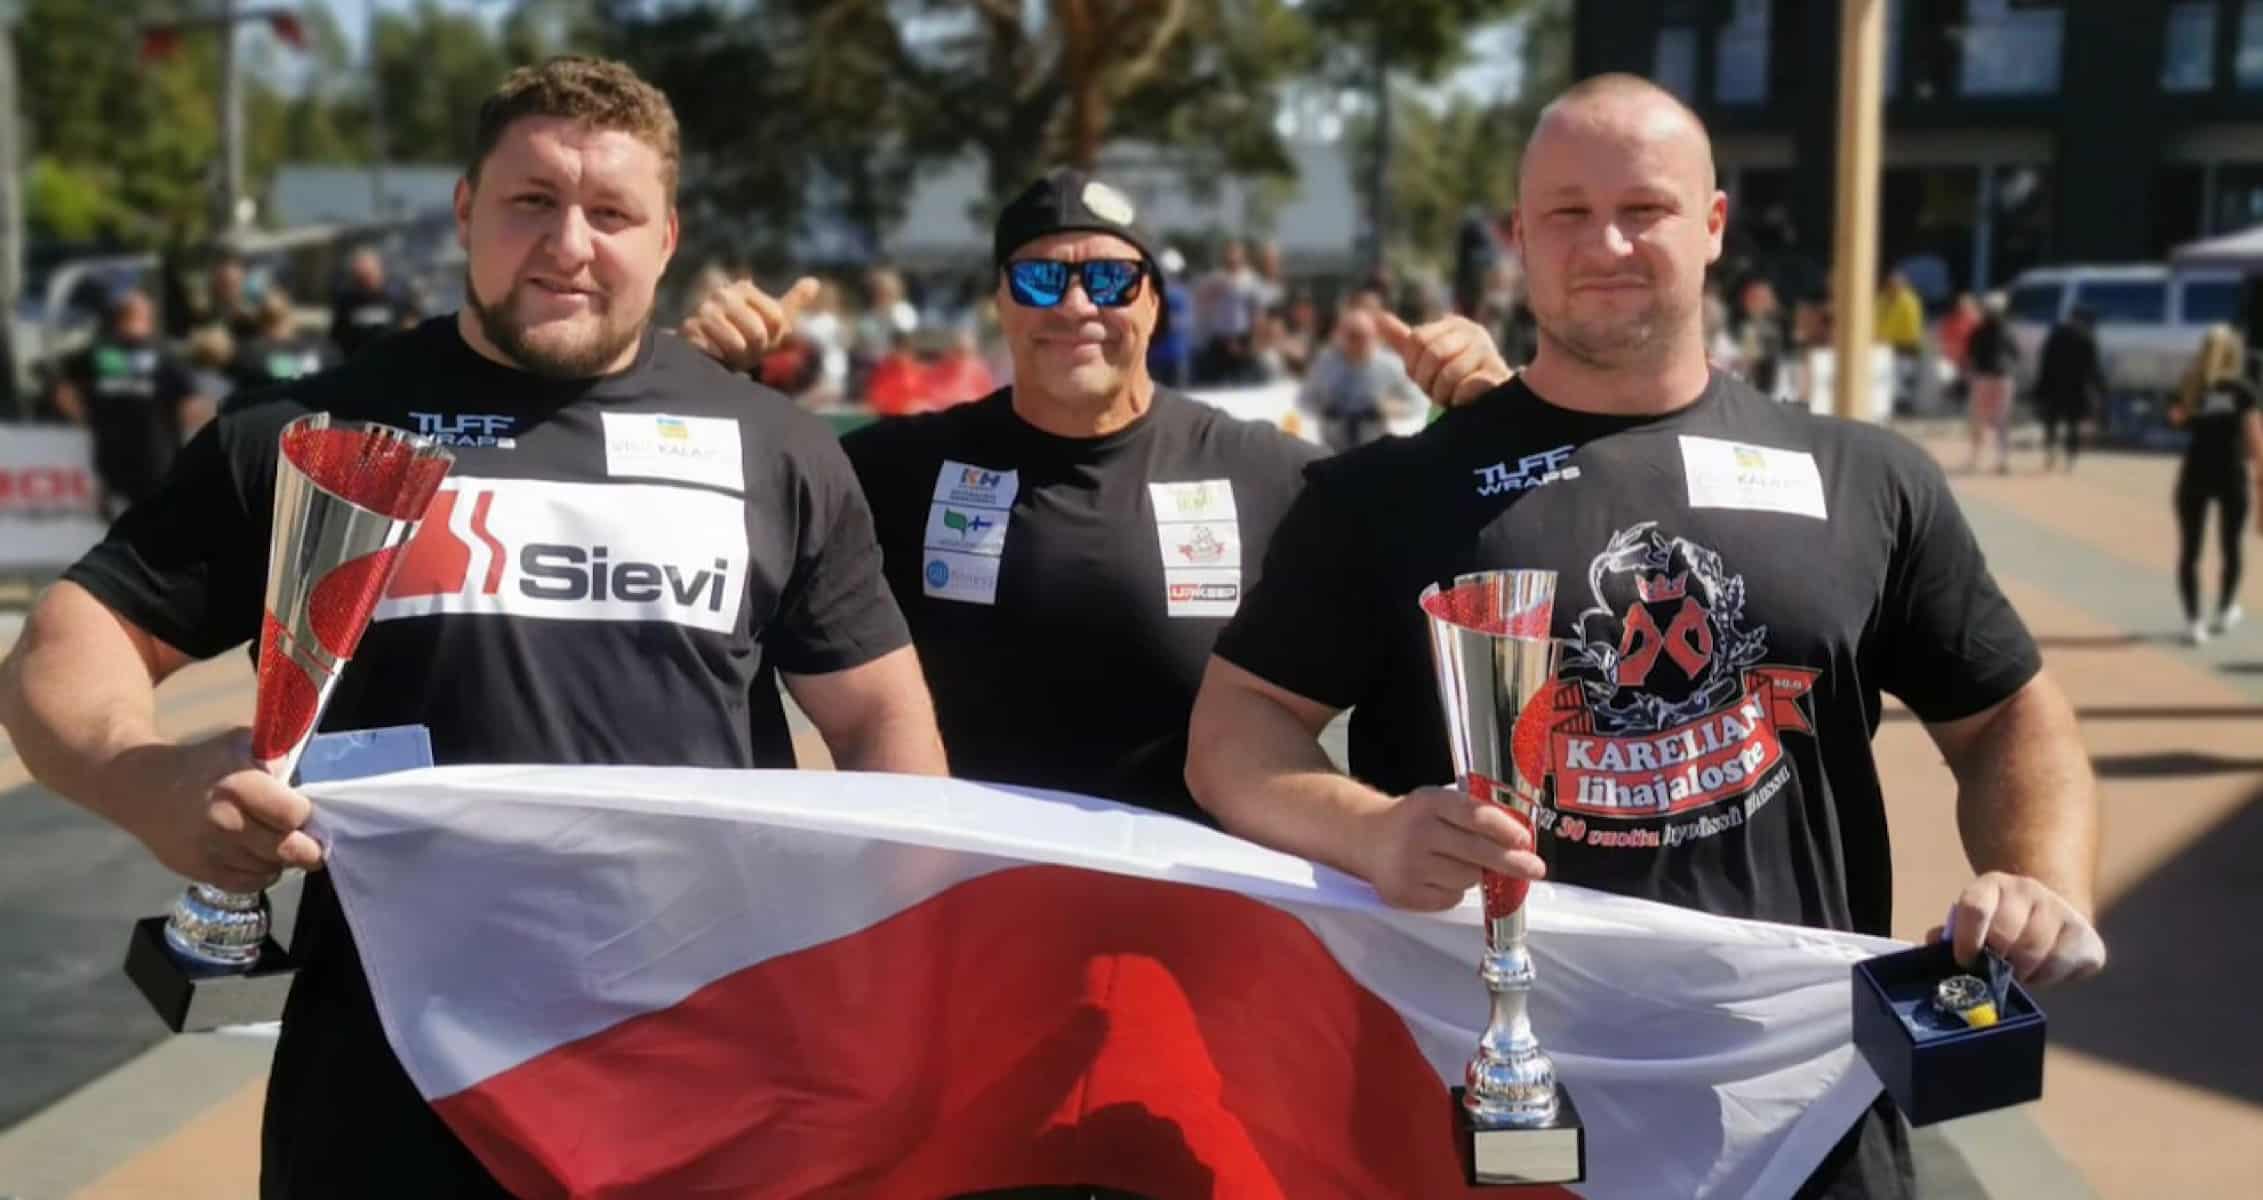
Who walked away victorious at the 2023 Strongman Champions League Team World Championships?
The results are in for the 2023 Strongman Champions League (SCL) Team World Championships and one team in particular dominated the competition. Oskar Ziółkowski and Adam Roszkowski earned big wins representing Poland at the competition which took place in Kalajoki, Finland on June 10th, 2023. The team of Ziolkowski and Roszkowski earned 47.5 points out of a possible 64.
Sixteen strongman competitors from eight different countries took part in the show. The final standings were as follows:
2023 Strongman Champions League Team World Championships Results
Oskar Ziółkowski / Adam Roszkowski (Poland) — 47.5 points
Aivars Šmaukstelis / Maris Krievelis (Latvia) — 44.5 points
Ervin Toots / Gunnar Gimbutas (Estonia) — 36 points
Kane Francis / Kelvin de Ruiter (UK/Netherlands) — 34 points
Colten Sloan / Sean Hayes (Canada) — 28 points
Mika Törrö / Jarkko Mehtälä (Finland) — 25.5 points
Jordan Osborne / Tyler Helm (Australia) — 20.5 points
Veli-Pekka Kauhanen / Heikki Pohjonen (Finland) — 16 points
Event Results
There were seven events at the show consisting of the Truck Pull, Forward Hold, Deadlift for Reps, Frame Walk, Bag Toss Medley, Two-Man Log Lift for Reps, and a Loading Race. Oskar Ziolkowski and Adam Roszkowski finished first in all but one of the events. The two Polish strongman athletes finished in sixth place in the Forward Hold event.
The event featured an 18,000 KG vehicle to be pulled down a 25-meter course for the fastest time possible within the 60-seconds:
Kane Francis / Kelvin de Ruiter — 19.57 meters
Oskar Ziółkowski / Adam Roszkowski — 19.38 meters
Ervin Toots / Gunnar Gimbutas — 19.25 meters
Aivars Šmaukstelis / Maris Krievelis — 19.21 meters
Colten Sloan / Sean Hayes — 19.2 meters
Mika Törrö / Jarkko Mehtälä — 19.1 meters
Veli-Pekka Kauhanen / Heikki Pohjonen — 18.31 meters
Jordan Osborne / Tyler Helm — 17.8 meters
Forward Hold
Each team had to sustain a front hold for as long as possible with an implement weighing 28 KG.
Veli-Pekka Kauhanen / Heikki Pohjonen — 78.5 seconds
Aivars Šmaukstelis / Maris Krievelis — 78.35 seconds
Mika Törrö / Jarkko Mehtälä — 77.36 seconds
Colten Sloan / Sean Hayes — 76.21 seconds
Ervin Toots / Gunnar Gimbutas — 71.18 seconds
Oskar Ziółkowski / Adam Roszkowski — 68.98 seconds
Jordan Osborne / Tyler Helm — 58.61 seconds
Kane Francis / Kelvin de Ruiter — 56.66 seconds
Deadlift for Reps
Within a two-minute time limit, teams had to perform as many deadlift reps as possible of 330 KG.
Aivars Šmaukstelis / Maris Krievelis — 21 reps
Oskar Ziółkowski / Adam Roszkowski — 20 reps (T-second)
Colten Sloan / Sean Hayes — 20 reps (T-second)
Jordan Osborne / Tyler Helm — 17 reps
Kane Francis / Kelvin de Ruiter — 15 reps
Ervin Toots / Gunnar Gimbutas — 14 reps
Mika Törrö / Jarkko Mehtälä — 9 reps
Veli-Pekka Kauhanen / Heikki Pohjonen — 5 reps
Frame Walk
Each strongman competitor walked a 320 KG frame back and forth along a 15-meter course for the fastest four-lap time within 75 seconds.
Oskar Ziółkowski / Adam Roszkowski — 60 meters, 35.41 seconds
Kane Francis / Kelvin de Ruiter — 60 meters, 38.23 seconds
Ervin Toots / Gunnar Gimbutas — 60 meters, 41.06 seconds
Jordan Osborne / Tyler Helm — 60 meters, 46.56 seconds
Aivars Šmaukstelis / Maris Krievelis — 60 meters, 52.58 seconds
Mika Törrö / Jarkko Mehtälä — 60 meters, 62.02 seconds
Veli-Pekka Kauhanen / Heikki Pohjonen — 42.43 meters
Colten Sloan / Sean Hayes — 49.75 meters
Bag Toss Medley
With a 60-second time limit, the Bag Toss Medley had eight bags weighing 22, 22, 24, 24, 26, 26, 30, and 30 KG.
Oskar Ziółkowski / Adam Roszkowski — Eight Bags, 26.66 seconds
Ervin Toots / Gunnar Gimbutas — Eight Bags, 37.44 seconds
Aivars Šmaukstelis / Maris Krievelis — Eight Bags, 44.22 seconds
Mika Törrö / Jarkko Mehtälä — Eight Bags, 46.16 seconds
Kane Francis / Kelvin de Ruiter — Six Bags, 29.77 seconds
Colten Sloan / Sean Hayes — Six Bags, 45.03 seconds
Jordan Osborne / Tyler Helm — Six Bags, 35.08 seconds
Veli-Pekka Kauhanen / Heikki Pohjonen — Five Bags, 58.7 seconds
Two-Man Log Lift for Reps
Teams lifted 250 KG log in pairs for max reps within a 60-second time limit.
Oskar Ziółkowski / Adam Roszkowski — 11 reps
Aivars Šmaukstelis / Maris Krievelis — Nine reps (T-second)
Colten Sloan / Sean Hayes — Nine reps (T-second)
Ervin Toots / Gunnar Gimbutas — Eight reps
Kane Francis / Kelvin de Ruiter — Six reps
Mika Törrö / Jarkko Mehtälä — Five reps (T-sixth)
Jordan Osborne / Tyler Helm — Five reps (T-sixth)
Veli-Pekka Kauhanen / Heikki Pohjonen — Two reps
Loading Race
The Loading Race comprised four implements weighing 90, 100, 110, and 120 KG. Teams had to load the implements onto a 10-meter platform for the fastest time.
Aivars Šmaukstelis / Maris Krievelis — Four implements, 35.04 seconds
Oskar Ziółkowski / Adam Roszkowski — Four implements, 36.77 seconds
Kane Francis / Kelvin de Ruiter — Four implements, 37.81 seconds
Ervin Toots / Gunnar Gimbutas — Four implements, 43.2 seconds
Mika Törrö / Jarkko Mehtälä — Four implements, 48.28 seconds
Colten Sloan / Sean Hayes — Four implements, 51.71 seconds
Jordan Osborne / Tyler Helm — Four implements, 54.51 seconds
Veli-Pekka Kauhanen / Heikki Pohjonen — Four implements, 56.22 seconds
Their impressive performance is certainly one to be commended. The two Polish strongman champions set themselves apart and showed dominance in nearly every event at the show. An impressive feat to say the least.
News and Editorial Writer at Generation Iron, Jonathan Salmon is a writer, martial arts instructor, and geek culture enthusiast. Check out his YouTube, Instagram, Twitter, Facebook, and Sound Cloud for in-depth MMA analysis.


")
")
")
")
")

")
")