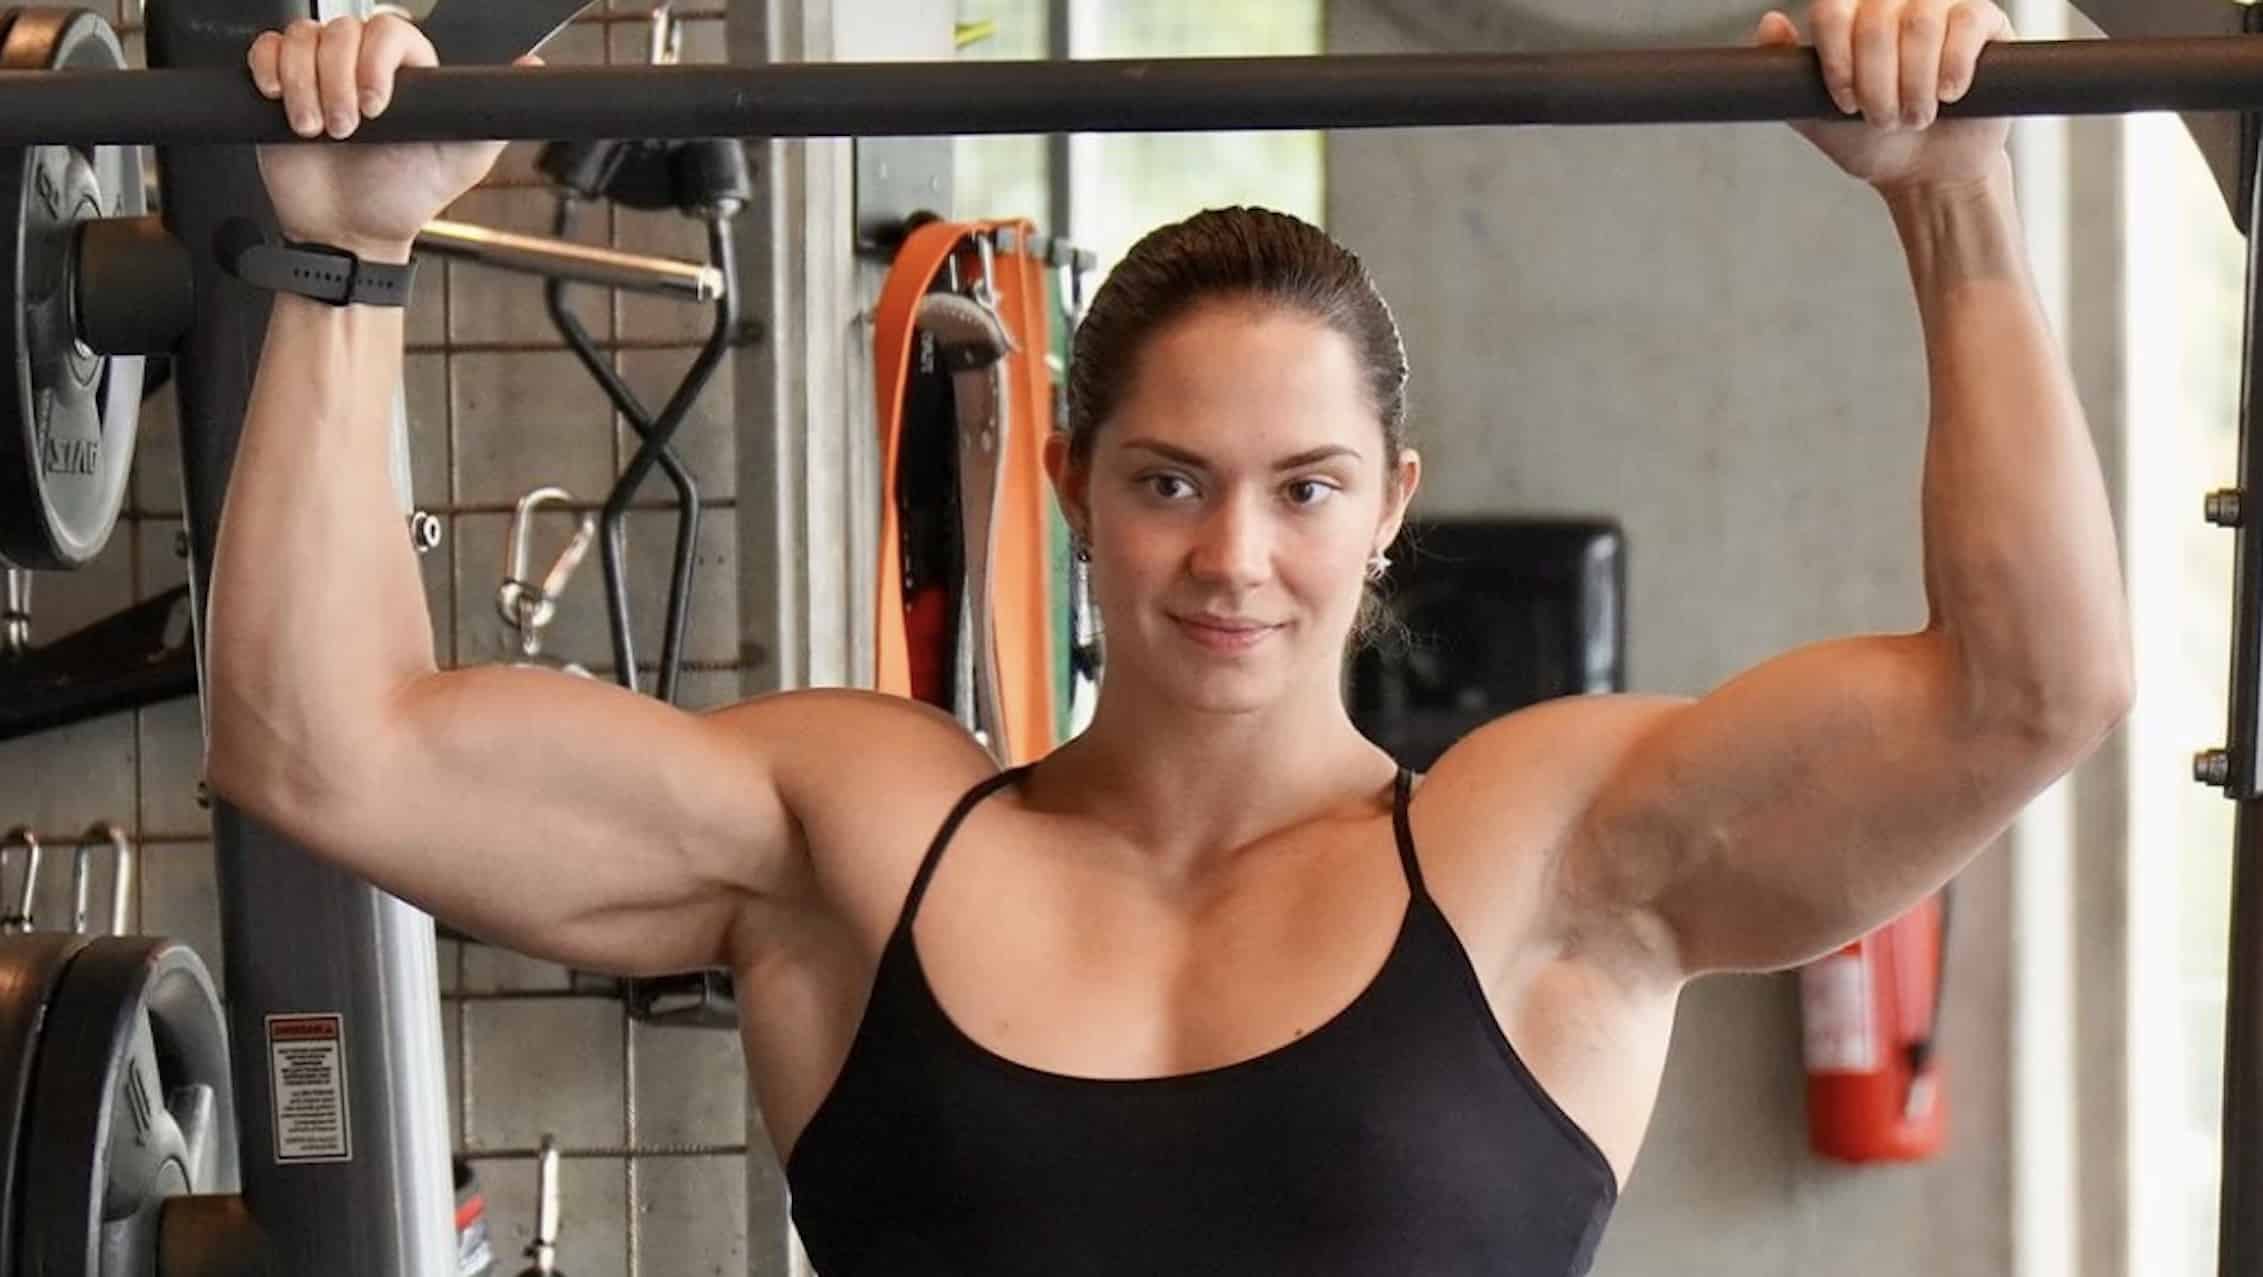
When it comes to building your physique, muscle symmetry is what separates the men from the boys. Bodybuilding is a game of illusions and having proportional muscle groups accentuates the size of your muscles. If competing is your goal, you need to train for symmetry and muscle balances, and one of the muscles you need to train are forearms.
Forearms are one of the most overlooked muscle groups. People usually train them as accessory muscles at the end of their arm workouts. It is no surprise these people have bulging biceps and skinny forearms.
If your goal is to have gigantic biceps and triceps, you can’t afford to skip training your forearms. While skinny forearms can make your arms look smaller, ripped forearms can add to the size of your bis and tris.
The Best Exercises for Forearms
Do these simple exercise to get Popeye forearms.
1. Farmer’s Walk
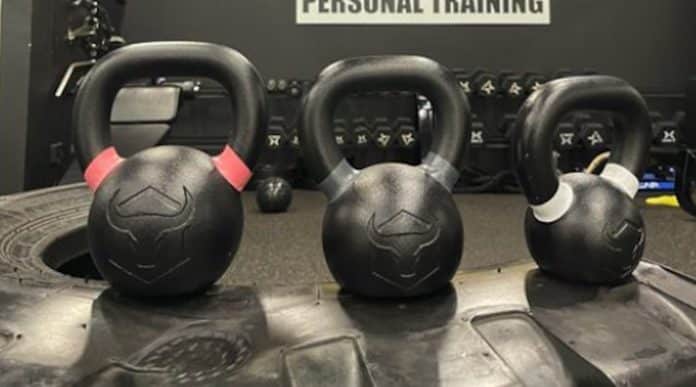
Farmer’s Walk is one of the most effective exercises to build muscle mass and strength in your forearms. Performing this exercise will make you stronger at other exercises where you need your grip strength. Farmer’s walk is a staple exercise in strongman training.
If you don’t have farmer’s walk black bars at your gym, you can use dumbbells for this exercise. Hold on to some heavy dumbbells and walk for as long as you can without dropping them. Challenge yourself to do more every other time you perform this exercise.
2. Barbell Finger Rolls
This is one of the most underutilized exercises for forearm development. Chances are, you would have never seen someone do this exercise, but you will be certain of its effectiveness once you do it yourself.
Hold a barbell with an overhand grip. Slowly roll down the barbell to the tip of your fingers. Return to the starting position, curl your wrist and squeeze at the top of the movement. You can also do a behind the back version of this exercise to isolate your forearms.
3. Cable Reverse Curls
Using a cable as opposed to free weights helps keep the tension on your target muscle group throughout the movement. While using dumbbells you have tension on your muscle on the concentric part of the motion but there is no tension on the eccentric part.
Cable reverse curls can help with building the top of the forearms and the outer biceps. Since this exercise can recruit your biceps, you need to make sure you’re performing it with complete control. Keep the reps slow and deliberate to exhaust your forearms.
4. Wrist Curls
Wrist curls are probably the most common forearms exercise performed in gyms around the world. If you have lagging forearms you should perform these exercises at the beginning of your workouts. This will help in recruiting your forearms in every exercise you do later in the workout.
Sit and the side of a bench and place your forearms on the bench with only your wrist hanging off. Hold a barbell or dumbells with an overhand grip with your thumbs over the barbell. You can also perform the underhand variation to target the inner forearms.
5. Cable Overhand Inward Wrist Curls
Cables can be incredibly useful at annihilating your forearms. Cable overhand inward wrist curls will isolate them and will fill them with lactic acid by the end of the exercise. For this exercise, sit on a flat bench with your forearms parallel to each other placed on your thighs.
Attach a straight bar handle to the pulley and sit at a distance where the weights don’t rack at the bottom of the movement. Curl your wrists inwards towards your knees and squeeze at the top of the movement.
Wrap Up
Overall, training these muscles is something that you cannot skip out on. You need to hit them, and make sure that you are hitting them hard. Which is your favorite forearm building exercise? Let us know in the comments below. Also, be sure to follow Generation Iron on Facebook and Twitter.
Rediscovering Masculinity: Big Ron Jones and Mike O’Hearn on Modern Men’s Struggles
In a recent episode of The Mike O’Hearn Show, renowned bodybuilder and fitness icon Mike O’Hearn welcomed the return of personal trainer Big Ron Jones.The episode delved into profound themes such as legacy in the age of social media, the significance of masculinity, and invaluable advice for young athletes navigating the modern digital landscape. This recap will highlight the key points of their discussion, providing insight into their perspectives on these pressing issues.
Big Ron Jones is a celebrated personal trainer and fitness expert known for his transformative impact on clients and his candid commentary on fitness culture. With over two decades in the industry, Jones has earned a reputation for his no-nonsense approach to training and his deep understanding of the psychological aspects of fitness. He has helped numerous individuals achieve their fitness goals, emphasizing the importance of mental resilience and consistency alongside physical training.
Mike O’Hearn kicked off the conversation by discussing the concept of legacy, particularly in the context of social media. He emphasized that one’s legacy is continuously shaped by their actions and interactions, both online and offline. According to O’Hearn, social media influencers need to recognize that every post and comment contributes to their lasting impact.
Mike O’Hearn criticized the prevalent trend among content creators who adopt a TMZ-style approach, focusing on criticism, hate, and outrage rather than creating meaningful content. He argued that this reactionary style fails to build a positive legacy and instead, contributes to a culture of negativity.
The Phenomenon of Sam Sulek
Mike O’Hearn highlighted the rising popularity of Sam Sulek as a counterexample. Sulek’s success, he noted, comes from his authenticity and passion for bodybuilding. Unlike many influencers, Sulek’s genuine personality and dedication have resonated with audiences, proving that being true to oneself can indeed be a path to success.
Big Ron Jones on Masculinity and Understanding
The Role of Masculine Energy
Big Ron Jones expanded on the discussion by addressing the broader implications of Sulek’s appeal. He suggested that Sulek stands out because many young men today are disconnected from traditional masculine energy, often lacking male role models for several generations. This absence, Jones argued, leaves them without a clear understanding of what it means to be a man.
Jones emphasized that this disconnect can lead to behaviors that are perceived as wrong, not out of malice, but out of ignorance. He shared that his approach to dealing with public and online hate has evolved to assume ignorance over malice. This perspective fosters an environment of growth and learning rather than cancellation.
The Importance of Masculinity
Both Mike O’Hearn and Big Ron Jones agreed on the critical role of masculinity in mental health. They asserted that a lack of masculine identity can lead to depression, anxiety, and other mental health issues. The online culture of criticizing and disrespecting masculine figures, they suggested, is often a coping mechanism for individuals grappling with their own sense of inadequacy.
Advice for Young Aspiring Athletes
Clark Bartram’s Experience
Clark Bartram, another guest on the show, shared a pivotal moment from his youth. At 14, he felt ashamed of his burgeoning muscles until a man at the local YMCA encouraged him, recognizing his potential as a future bodybuilder. This affirmation changed Bartram’s life trajectory, highlighting the power of positive mentorship.
Big Ron Jones’ Guidance
Building on Clark Bartram’s story, Big Ron Jones stressed the importance of the “gravity of one’s works.” He explained that experienced individuals like himself, Mike O’Hearn, and Bartram hold sway because of their extensive accomplishments. Their words carry weight, impacting the next generation.
Jones advised young athletes to understand that not being the star in their current social environment does not preclude future success. He encouraged them to apply themselves diligently and remain accountable. Consistent effort, he assured, would eventually lead to success, transcending the narrow confines of their school years.
Navigating Instant Gratification
Mike O’Hearn raised a pertinent issue—how to motivate young people to pursue long-term success in an era dominated by instant gratification. Jones responded by pointing out the unreality of perpetual online presence. He urged young athletes to disconnect from social media and focus on steady, dedicated work.
Jones used the example of online dating to illustrate his point. He noted the misconception that most women only date men over 6’2″, a narrative perpetuated by the internet but detached from reality. Such misleading standards can create hopelessness, similar to unrealistic expectations in fitness. Jones advocated for giving oneself grace and understanding that slow progress can lead to great achievements.
Wrap Up
The episode of The Mike O’Hearn Show featuring Big Ron Jones offered a compelling exploration of legacy, masculinity, and fitness in the digital age. Their insights provide a roadmap for young athletes and social media influencers alike, emphasizing authenticity, patience, and the power of positive mentorship. As they navigate the complexities of modern life, O’Hearn and Jones’ wisdom serves as a guiding light, encouraging a focus on genuine growth and meaningful impact.
You can watch the full episode above. And don’t forget to check back every Friday for new episodes on the Generation Iron Fitness Network or wherever podcasts are downloaded.
Elliott Atwell pleaded guilty to charges on Thursday.
A 34-year-old bodybuilding coach pled guilty on Thursday to federal child exploitation and child pornography charges.
Charlottesville, VA native Elliott Atwell was indicted on charges in 2023 after allegedly sending inappropriate videos and gifts to minors. On Thursday, he pled guilty to one count of sexual exploitation of a minor and one count of possession and access with intent to view child pornography, according to the U.S. Attorney’s Office, Western District of Virginia.
According to multiple court documents, Atwell received sexual videos from six minors he manipulated between 2013-2020. He also sent them gifts such as digital cameras, Viagara, and other items. The FBI searched Atwell’s iCloud account and found over 300 images and videos of minors.
Atwell will face a minimum penalty of 15 years at sentencing. This also carries a possible maximum of 30 years.
Elliott Atwell Pleads Guilty
Elliott Atwell was originally indicted in 2023. This was not the first time that Atwell has been accused of behavior such as this. There have been multiple complaints on social media about Atwell’s behavior. Many screenshots of alleged conversations with clients show Atwell asking for sexually explicit videos and photos.
The U.S. Attorney’s Office commented on the situation in 2023:
“BETWEEN DECEMBER 2013 AND APRIL 2020, ATWELL ENTICED AT LEAST SIX MINORS TO RECORD THEMSELVES ENGAGING IN SEXUALLY EXPLICIT CONDUCT AND THEN SEND THE RECORDINGS TO HIM,” ACCORDING TO A TUESDAY STATEMENT FROM U.S. ATTORNEY CHRISTOPHER KAVANAUGH OF THE WESTERN DISTRICT OF VIRGINIA AND FBI SPECIAL AGENT STANLEY M. MEADOR.”
Atwell has worked with many bodybuilders and models and this seems to be a pattern of behavior. In 2020, Atwell was arrested and charged after sending a 16-year-old male enhancement pills.
In 2020, bodybuilding YouTuber Greg Doucette highlighted the scandal and accusations made against Elliott Atwell – and broke it down in a 15 minute YouTube video. You can see his discussion covering the news below:
Using grip trainers will allow you to lift heavier weights to build more muscle.
Grip strength is crucial for executing many movements. Your targeted muscle group may have the required strength for the lift, but lifting the weight becomes only possible with sufficient grip strength. Furthermore, research indicates that grip strength may indicate overall health, enhancing muscle strength, bone density, and bodily functions (1).
Gym-goers may encounter grip strength limitations during their training sessions. They often turn to weightlifting straps or grip trainers to address these issues. Weightlifting straps can provide immediate relief by alleviating pressure, whereas grip trainers are a long-term solution designed to build and enhance grip strength gradually.
A grip strengthener, a specific grip trainer, improves grip quality. For those without access to a grip strengthener, this article presents three effective grip training exercises, complete with a detailed guide. It also highlights the significant benefits of using a grip trainer, underlining its value in a comprehensive fitness regimen.
Grip Trainer Benefits
A grip trainer is an effective way to build grip strength over time. It works by building and strengthening your forearm muscles, which in turn boosts your grip. Below are some of the benefits.
Increased Grip Strength
A grip trainer targets your hands, wrists, and forearms. The regular flexion and extension of these muscles isolate them and put constant tension on them, which makes them stronger. Improved grip strength allows for more efficient use of your hands and enhances your ability to perform exercises that demand a strong grip, such as deadlifts.
Prevents Injuries
A weak grip can expose you to injuries, especially wrists, fingers, and forearms. Regularly doing a grip trainer exercise improves your grip strength, reducing your chance of injuries and enabling you to perform daily activities like lifting, grabbing, or holding objects better.
Bigger Forearms
As much as grip trainers are meant to improve your grip strength, they also increase the size of the targeted muscles, which helps with your grip. These routines will boost growth in your forearms and flexors. So, grip trainers will increase your grip strength and improve your physique.
Improves Dexterity
Regular use of a grip trainer improves hand and finger use. Regular exercise of the limbs makes it easier to manipulate fingers, whether you are a musician, driver, hairdresser, or typist. It improves finger skills.
The farmer’s walk is an effective exercise for building and strengthening your forearms for a firm grip. It involves holding free weights like dumbbells or kettlebells in each hand and walking. However, you can do farmer’s walks with heavy grocery bags or buckets. These weights should be as heavy as you can carry to put tension on your targeted muscles. Here is a step-by-step guide on how to do the farmer’s walk correctly using kettlebells.
The reverse wrist curl also helps to build and strengthen the forearms and wrists. You can perform this exercise with a dumbbell or a barbell to improve your grip strength. Using an EZ bar for this exercise is also an option, and it is easy on the wrists.
This exercise isolates your forearms and targets your brachioradialis. This is the muscle in front of your arm responsible for firmly grabbing objects. It also targets your pronator teres, which helps rotate your forearm to face downward, and the supinator, which turns your arm to face upward. Here is a step-by-step guide on correctly doing the reverse wrist curl using an EZ bar.
Grab an EZ bar with both hands using an overhand grip and stand up straight.
Ensure you extend your arms fully, maintain a straight back, lift your chest up, and pull your shoulders back.
Lock your elbows on the sides and curl your arm to precisely 90 degrees.
Next, let your wrists relax. This is your starting position.
Then, extend your wrist upwards with the bar and slowly lower it back to the starting position to complete a rep.
Repeat for as many reps as you desire.
Hand Grippers
Hand grippers are solely hand-training exercises that target your hands, wrists, and forearm muscles (flexors and extensors). They’re done with grip strengtheners and portable hand-held tools with springs. Grip strengtheners are not too bulky and use resistance to work your hands, allowing you to do them anywhere.
Since hand grippers are unilateral, they effectively train both sides of your hands equally. You can also use them to isolate and correct muscle imbalances in your hands and forearms. Hand grippers also employ isometric holds, which place tension on your forearms, which is good for growth (2). Here is a step-by-step guide on how to do the hand grippers correctly.
Grab a grip strengthener with your right hand. One handle should rest on your palms, and the opposite should be wrapped around your fingers.
Next, slowly squeeze the hand gripper with your fingers and palm until they come together, and pause in that position for about four to five seconds.
Slowly and in a controlled manner, release the hold.
Repeat this action for as many reps as you desire and mirror the movement for the left hand.
Alley, D. E., Shardell, M. D., Peters, K. W., McLean, R. R., Dam, T. T., Kenny, A. M., Fragala, M. S., Harris, T. B., Kiel, D. P., Guralnik, J. M., Ferrucci, L., Kritchevsky, S. B., Studenski, S. A., Vassileva, M. T., & Cawthon, P. M. (2014). Grip strength cutpoints for the identification of clinically relevant weakness. The journals of gerontology. Series A, Biological sciences and medical sciences, 69(5), 559–566. https://doi.org/10.1093/gerona/glu011
Oranchuk, D. J., Storey, A. G., Nelson, A. R., & Cronin, J. B. (2019). Isometric training and long-term adaptations: Effects of muscle length, intensity, and intent: A systematic review. Scandinavian journal of medicine & science in sports, 29(4), 484–503. https://doi.org/10.1111/sms.13375
Conor McGregor’s return to UFC will be delayed following an injury.
UFC fans will have to wait a little longer to see Conor McGregormake his return to the octagon.
On Thursday, Dana White announced that the main event bout between McGregor and Michael Chandler has been cancelled following an injury. McGregor shared an Instagram story on Wednesday night with hints that he might be dealing with an injury and White has confirmed these rumors. The injury is unknown at this point.
White announced that the new main event will be Alex Pereira vs. Jiri Prochazka for the light heavyweight title. The co-main event will feature Brian Ortega vs. Diego Lopes in a battle between a former featherweight champ and rising star in UFC.
Last week, there was an unexpected cancellation to a press conference that was scheduled in Ireland. The speculations were confirmed by White on Thursday and both sides will work to reschedule this event, which could take place later this summer.
Conor McGregor Suffers Injury, Out Of UFC 303
Conor McGregor was originally scheduled to return to action for the first time in three years. In 2021, McGregor suffered a broken leg against Dustin Poirier. The former two-division champion has just one victory since 2016 and has been in the ring just four times. McGregor also took on Floyd Mayweather in a boxing match back in 2017.
Chandler’s last fight also came against Poirier. This was a submission loss at UFC 281 in 2022. Chandler became a three-time lightweight champion after signing with the UFC in 2020. Michael Chandler went from respecting his rival to apparently having an altercation with the brash Irishman.
Michael Chandler was also featured in the documentary The Hurt Business – which chronicled the history of MMA from its inception to the modern era. The film also followed a wide variety of MMA fighters leading up to their matches including Jon Jones and Ronda Rousey.
Michael Chandler was one such athlete featured, at which time he was a part of Bellator. The film provides a unique insight into Chandler’s fighting philosophy then compared to now. You can watch the trailer for The Hurt Business below.
A full guide on how to properly execute the Pendlay Row to achieve optimal back gains
There are all sorts of rows you can be doing; dumbbell, the T-bar, machines; but are you incorporating the Pendlay Row into your back workouts? The Pendlay row is a movement crafted by the late Olympic Weightlifting Coach, Glenn Pendlay, to help in pulling movements. Conducted in a very similar fashion to the barbell row, the Pendlay row aids in back gains for both muscular size and strength.
This guide will be covering how to do the Pendlay Row, the benefits, alternatives, Dos and Don’ts, and suggestions.
Editor’s Note: Generation Iron’s content is meant to be informative and should not take the place of advice and/or supervision from a medical professional/trainer. The articles and opinions on this site are not meant to be used as diagnosis, prevention, and/or treatment of health problems. Speak with your physician/trainer if you have any concerns.
How to Do The Pendlay Row
Form is more important than weight, words to live by. It is also an accessory movement, and you want to nail the proper form before going heavy. Proper form helps contribute to better results, such as strength, size, and hypertrophy.
Step 1: Setting up
The barbell should be on the floor, and grip should be approximately shoulder width apart with the hips setup like you are about to deadlift.
Step 2: Pull
Brace your core, and in a controlled manner, pull the barbell to the base of your chest, but do not allow your shoulders or hips to come forward.
Step 3: Do it Again
Return the bar all the way to the floor with control, reset, then repeat the movement for the desired amount of repetitions.
The Pendlay Row has plenty of benefits in both muscular development, improving performance in other lifts, as well as developing both strength and power.
Muscular Development
The Pendlay Row forces the lifter to use strict form and a full range of motion, focusing mainly on the lats and rhomboids. Combine that with proper loading, maintained tension throughout the movement, and some decent volume, muscle hypertrophy will improve as you stay consistent and practice the movement.
Transfer to Other Lifts
The Pendlay Row is something that helps the development of all pulling exercises, as well as a few others. Being that the lifter is bracing their back and core with this movement, it can be transferred over to movements such as the big three compounds: squat, bench, and deadlift. It transfers to compound lifts where the stress on the back will be greater as the lifter is adding more weight or has a technique that involves more activation from the back.
Pulling Power
The Pendlay Row also contributes massively to overall pulling power. The movement comes from a dead stop and contributes massively to concentric strength. The strength and power here can be transferred to becoming stronger in other pulling movements such as the snatch, clean and jerk, and deadlift.
The Pendlay Row also improves grip strength, which can be applied to lifts as simple as bicep curls or even farmer carries.
Sets and Reps
The Pendlay Row is considered both a compound and an accessory movement, so just how heavy should you go? How many sets should you do? How many reps? Well, this all depends on what your personal goals are.
Strength: For strength gains, 3-4 sets of 1-5 with relatively heavy weight (but not heavy to the point where form is sacrificed)
Size and Hypertrophy: For the goal of gaining more muscle mass and definition, 4-5 sets with the rep ranges of 6-12 are ideal with moderate weight.
Endurance: Endurance athletes should be aiming for 3-4 sets of 12+ with light weight.
Tip: The lifter can increase weight throughout the exercise, but not to the point of compromising form!
Rep ranges may vary depending on the exercise as well as the goals of the lifter. Check out this video from Gravity Transformation for more on rep ranges.
What to Avoid
Unlike a barbell row, the Pendlay row does not give the lifter that momentum to help complete each rep. There are a lot of things you could do when performing the Pendlay Row that could hinder performance or the desired results.
Poor Form
Form can easily be compromised with the Pendlay Row, specifically the angle of the back. Maintain the hip hinge throughout the movement, pulling mostly with your arms and shoulders, without jerking your back up just to achieve a completed rep.
Elbow flare is also another way that form can be compromised which in turn does not deliver the best results because this can lead to more activation of the rear deltoids rather than the lats and middle back. Elbows do not completely need to be tucked to your side, but you certainly do not want to chicken wing your arms; this will put more of the stress and tension on shoulders and arms rather than the lats.
To keep yourself in check, use cues to guide yourself throughout the lift. Remind yourself to pull the bar to your hips, keep your elbows close, etc.
Too Much Weight
Just about everyone loves to lift heavy, no doubt about it. However, going too heavy can lead to not only poor form, but also injuries, something that may affect your progress moving forward. Go lighter, nail that form, get that good contraction, and grow! As your technique improves, the strength will come along with it.
Pendlay Row Alternatives
Maybe you have not been fully convinced of throwing the Pendlay Row into your programming, and that’s okay. There are a couple of great alternatives that are similar movements which provide similar benefits.
The Barbell Row
Classic, iconic, infamous. Three words to describe the movement, also known as the bent-over barbell row. The simple yet effective movement has been a staple in back workouts across the globe since the dawn of time. Maybe not that long, but it has been around for a while.
The barbell row can be done with overhand or underhand grip and is performed almost exactly the same as the Pendlay Row, but you do not rest the weight on the floor after each repetition. This in turn puts more stress on the lower back as well as the hamstrings when compared to the Pendlay row, where the bar would be going to a dead stop after each repetition.
Form Tip: Because the bent-over barbell row puts more stress on the lower back, the lifter should consider using less weight and hitting higher repetitions (better for muscular development and hypertrophy).
The Seal Row
The seal row is something that completely removes stress on the lower back and hamstrings from the equation, but still provides great back gains for both size and strength wise.
In this movement, the lifter will be laying face down on a bench with the barbell underneath the bench. From there they will pull the weight to their chest, which would essentially be the underside of the bench. This can be done on a flat bench, or an incline bench where the lifter will set up the same way but drag the bar along the metal piece that props the bench up into its incline position. Both variations can help grow that extra thick and strong back.
Form Tip: When performing a seal row on a flat bench use smaller plates to get a better range of motion. If smaller plates are not available, you can also elevate the bench on small boxes.
Frequently Asked Questions (FAQs)
Congratulations, you made it all the way to the end of the article! Now it’s time for the questions that need to be answered.
How can I Improve My Form?
Should I use the Pendlay Row?
Do I Need to use a Barbell?
Let’s take some time and answer these questions!
How can I Improve My Form?
One of the biggest things to improve form is by using cues. Cues are specific actions you tell yourself to reinforce your technique during a lift. They remind the individual of key points needed to complete the lift or weak points to focus on.
For example, when performing the Pendlay Row the lifter can remind themself:
To dig their feet in – for lifters that are using their legs for momentum and doing almost a Romanian deadlift.
Pull the bar to their hips – for lifters that are not completing a full range of motion to help them squeeze at the top of the lift.
Keep the elbows tight – for lifters that might be flaring their elbows and have trouble engaging their lats.
Should I use the Pendlay Row?
Yes. Do not be afraid to program these into your workouts! The Pendlay Row is beneficial for muscle building and strength as a whole. This does not just pertain to people who compete in things such as weightlifting or powerlifting! This is a great exercise for bodybuilders, crossfitters, or recreational gym-goers that want to improve their overall core and back.
Do I Need to Use a Barbell?
A barbell is only one way to perform the exercise! Yes, originally the Pendlay Row was created using just a barbell. However, you can absolutely complete a Pendlay Row with dumbbells or even kettlebells.
Wrap Up
Overall, the Pendlay Row is a great exercise to really boost your back gains. With minimum equipment you can really hit the back as a whole.
If you’ve ever explored recovery methods and tools, you’ve likely come across cold plunge tubs and ice baths. While few people relish the idea of sitting in freezing water, many endure it for its potential benefits, such as muscle recovery and reduced inflammation. However, cold water therapy offers many advantages but can be costly. Simple ice baths can get pretty expensive, and high-end cold plunge kits with filtration systems and ozone generators can cost several thousand dollars. This might lead you to consider creating your own DIY home cold plunge.
Fortunately, you’re in the right place. I’ll share some cost-effective DIY cold plunge ideas, saving you a significant amount compared to commercial options. Let’s look at some major DIY concepts step-by-step and suggest alternatives if you’re still unsure about setting up your cold plunge.
Let’s dive in and learn how to make your own cold plunge.
What Is a Cold Plunge Tub?
A cold plunge tub, also known as an ice bath, is used by athletes and gym-goers for recovery, similar to home saunas. Typically, these tubs maintain a water temperature between 45 and 55 degrees Fahrenheit, though some can be colder.
Research on cold water immersion therapy is limited, but potential benefits include reduced muscle soreness, decreased inflammation, and enhanced immune support. Some people also use cold plunges for mental health benefits, incorporating mindfulness, meditation, or breathing exercises.
The recommended duration for a cold plunge session varies. Some suggest just a few minutes to avoid risks like cold shock or hypothermia, while others claim a minimum of 10 minutes is needed to gain any health benefits. How cold the water is will also influence how long you should stay in. My advice? Start gradually, similar to strength training, and increase your time safely. Reduce your time for colder temperatures, especially below 40 degrees.
Now, let’s look at how you can build your own cold plunge at home.
DIY Cold Plunge 1: Stock Tank
A stock tank is one of the simplest and most affordable ways to enjoy an ice bath at home. You’ll need a stock tank or water trough large enough to fit you—typically a 100-gallon capacity or larger, which costs around $100. You can find stock tanks at local stores like Tractor Supply; the Tuff Stuff Stock Tank is a popular choice for DIY projects, as is Rubbermaid.
Made from heavy-duty plastic, a stock tank can withstand extreme weather conditions. The main drawback is the maintenance: you’ll need to replace the water after each use and add ice bags to cool the water. Without temperature control or filtration, the water will become stagnant quickly if left unattended.
Here’s an easy way to extend your water’s freshness for a couple of days, but remember, this budget-friendly ice bath will require some effort for each session.
What You Need:
Stock tank: Aim for at least 100 gallons, more for larger athletes.
Bags of ice: The amount depends on your desired water temperature.
Water: Fill the tank with tap water from a hose.
Waterproof tarp: To keep debris out if you want to save the water for a day or two.
Brominating concentrate: A common sanitizer for hot tubs to keep the water fresh. Get testing strips to measure the water’s pH.
How To Build It:
Set your stock tank on level ground and fill it with water.
Add ice (10 to 20 pounds should suffice, depending on how cold you want the water).
Step into the tank; you’re ready to cold plunge!
After use, dump the water by tipping the tank over or using the stock tank’s valve.
Expert tips: To save on ice, freeze water bottles and use them instead. If you want the water to last a bit, cover the tank with a tarp after use and add brominating concentrate (about a half-teaspoon per 100 gallons). Use pH testing strips to ensure the water remains safe.
DIY Cold Plunge 2: Chest Freezer
If you prefer not to buy bags of ice for every session, a chest freezer might be a better DIY option. Though more expensive than a stock tank (around $500), a chest freezer offers insulation and temperature control, allowing you to regulate the water temperature between uses. It also comes with a drain plug.
You’ll need to seal the seams of the chest freezer initially, and this method won’t provide long-term water sanitation. However, the maintenance is straightforward since you won’t need to buy ice each time.
What You Need:
Chest freezer: Minimum 15 cubic feet, costing around $200-$500.
Caulking gun and marine sealant: To waterproof the edges and seams.
Temperature controller: To prevent the freezer from freezing the water (available for about $35 on Amazon).
Water: From a convenient source, like a hose.
How To Build It:
Place the chest freezer on level ground near an outlet.
Seal the seams with marine sealant to prevent leaks, including around the drain plug (but don’t seal it shut).
Let the sealant dry, then use Flex Seal or a similar product for extra waterproofing.
Plug the temperature controller into an outlet and connect the chest freezer. Set the thermometer in the tub to maintain your desired temperature.
Fill the freezer with water, turn it on, and you’re ready to cold plunge.
Other Alternatives
Here are additional ways to personalize your cold plunge build:
Use a bathtub: If large enough, it can serve as a trial ice bath.
Take a cold shower: A good way to acclimate to colder water temperatures before full immersion.
Add a water chiller and filter: Helps maintain water temperature and quality. For non-insulated containers, a more powerful chiller may be needed.
Use an insulated cooler: Large coolers offer built-in insulation and drainage plugs, though they can be expensive.
Benefits of Cold Plunges
Although research is limited, some studies suggest potential benefits of cold water therapy:
Reduce pain and inflammation: Similar to a full-body cold compress, it can help manage pain and inflammation.
Perceived muscle soreness: Cold plunges may help with perceived muscle soreness after intense training.
Mental health and stress: Cold water immersion may reduce stress, anxiety, and depression, impacting the sympathetic nervous system positively.
FAQs
You may have some questions regarding your DIY cold plunge, so let’s look.
Can I Make My Own Cold Plunge? Yes, you can. The simplest way is to buy a large stock tank, fill it with water and ice, and you’re ready to plunge. Another method is to waterproof a chest freezer and fill it with water, using a temperature controller to maintain a constant temperature.
What Is the Cheapest Way to Make a Cold Plunge? The cheapest way is to use your bathtub, filling it with ice and water. Alternatively, a large stock tank for around $100, plus the recurring cost of ice, is a budget-friendly option compared to commercial cold plunge tubs.
Is a Cold Shower as Good as a Cold Plunge? Cold showers don’t get as cold and don’t fully immerse your body, so they may not offer all the benefits of a cold plunge. However, they are a great starting point for acclimating to cold water therapy before progressing to full immersion.
If you do not want to DIY your cold plunge and want an actual place to do it, Generation Iron team recommends for all of your ice bath needs, which is Ice Barrel.
While it is not as cheap as a DIY cold plunge, Ice Barrel gets the job done. It stands 42 inches high with a width of just 31 inches, making it easy to transport and store. It is still big enough for you to stay in an upright position, rather than a reclined position, which is great for you to fully experience the natural response of forced cold exposure. The design of Ice Barrel also allows you to choose how much you wish to submerge yourself, whether that’s up to your neck and shoulders or even dunking completely in the cold water.
Another thing worth mentioning is the Ice Barrel is eco-friendly, as it is made from linear low density polyethylene (LLDPE), which is a non-toxic, BPA-free, medical-grade material. The barrels are also non-porous, so it won’t absorb oils, toxins or other contaminants
Final Thoughts
Creating a cold plunge at home is feasible and cost-effective. The key steps are:
Choosing the right tub.
Waterproofing the tub if needed.
Adding water and a method to regulate the temperature.
Once set up, you’re ready to enjoy the potential benefits of cold water therapy. Dive in—safely—and start experiencing the rewards of cold plunging.
Let us know what you think in the comments below. Also, be sure to follow Generation Iron on Facebook, Twitter, and Instagram.
Generation Iron may receive commissions on purchases made through our links. See our disclosure page for more information.
Hunter Labrada broke down what a day of eating looks like during a training and off day.
Hunter Labradais 13 weeks out from his next appearance on stage during the Promuscle Italy Pro. He is working to qualify for the 2024 Olympia and improve upon his standing from last year. Recently, Labrada shared a physique update at 284 pounds and his current diet plan.
In 2022, Labrada fell to seventh on the scorecard. He was victorious during the 2023 Tampa Pro before finishing as the runner-up at the Texas Pro. Labrada hit the Olympia stage once again and finished sixth in 2023. Labrada showed off his physique once again during the NPC Western Michigan Bodybuilding Championships. He looked well-conditioned on stage. This was one of the major improvements he made during the year to prepare for the 2023 Olympia.
“284lbs out of bed this morning, figured I’d share a full transparency update💪🏻
–
Currently, I don’t feel like I’m dieting! I know that’ll change sooner than later, but as of now training performance is at an all time high, I have more energy due to the fact I’ve lost a little trash weight, and my recovery/fatigue management is golden!”
Labrada shared that he is training two on, one off with a split including push, pull, legs, and arms. He begins each morning with 20 minutes of fasted cardio as well.
Hunter Labrada’s Current Diet Plan
Hunter Labrada also broke down what a day of eating looking like for him, both on training day and on an off day.
Training Day
Meal 1
200g Lean Beef
2 Whole Eggs
250g Rice
50g Green Veg
100g Blueberries
Meal 2
200g Chicken Breast
250g Rice
100g Spinach
10g Ghee
Meal 3
60g Whey Isolate
50g HBCD
Meal 4
200g Chicken Breast
250g Rice
100g Asparagus
Meal 5
200g Lean Beef
250g Rice
100g Spinach
15g psyllium husk powder
Meal 6
60g Whey
30g Almond butter
Off Day
Meal 1
200g Lean Beef
2 Whole Eggs
250g Rice
50g Green Veg
100g Blueberries
Meal 2
200g Chicken Breast
250g Rice
100g Spinach
10g Ghee
Meal 3
60g Whey Isolate
250g Rice
Meal 4
200g Chicken Breast
250g Rice
100g Asparagus
Meal 5
200g Lean Beef
250g Rice
100g Spinach
15g psyllium husk powder
Meal 6
60g Whey
30g Almond butter
“Looking forward to continuing sharing these updates throughout prep! Let me know in the comments any other info yall would like to know!”
How does The Rock keep his six pack abs in his 50s?
Dwayne Johnson, famously known as “The Rock,” isn’t only an A-list celebrity known for appearing on the big screen in movies such as Red Notice. He has a long and impressive history with bodybuilding. He was once married to an IFBB Pro League professional bodybuilder and had a bodybuilding show to compete with the Mr. Olympia and Arnold Classic competitions in development called Athleticon.This article will review one of the ways The Rock works on his abs and core – the seated leg raises.
Johnson’s dedication and success in bodybuilding have not gone unnoticed. He received the prestigious Mr. Olympia “Man of the Century” ICON award. But Johnson’s physique is not just a thing of the past — as a professional wrestler-turned-actor, he remains jacked and huge to this day, and it seems like he is always getting bigger and more shredded.
For someone who is in his 50s, The Rock is in fantastic shape. He is a fitness icon for many half his age! He regularly shares his workout program, and many are excited to see what has got him as shredded as he is.
One thing many people soon notice about The Rock is his abs. They aren’t the regular six, eight, or even 12-pack many other celebrities have. He shared in an interview that this is due to an injury from his professional wrestling days. He tore his quad off his pelvis, and the chain reaction tore his abdomen wall.
One thing to note is that he didn’t give up even then because of his commitment to wrestling. The Rock gets up at 4 am and trains six days a week. Even though many would give up after such an experience, he’s still in shape and has devised ways to train his core.
In a recent Instagram video, The Rock shared one of his trusted core, and ab-building routines — bench seated leg raises. The key for him has been to focus on strength rather than aesthetics. The Rock wrote on Instagram:
“I’m the last dude to give abdominal advice, but after I tore my abdomen wall during a wrestling match (fun pain), I had to really concentrate on ab exercises that strengthened my entire wall and core again.”
Full Name: Dwayne Douglas Johnson (The Rock)
Weight
Height
Date of Birth
260 – 270 lbs
6’5”
05/02/1972
Occupation
Era
Nationality
Professional Wrestler, Actor
1990s, 2000s, 2010s, 2020s
American
The Rock Core Exercise — Bench Seated Leg Raises
Below is a video The Rock uploaded to his Instagram recently of him performing bench seated leg raises:
Bench seated leg raises are a variation of leg raises that help strengthens your core. With this ab movement, the resistance comes from your bodyweight. So it’s easy to add them to your workouts at home or in the gym. All you need is a flat bench.
Doing leg raises is a better way to activate the “global” muscles (muscles of the outer core that help stabilize the torso) than even planks(1). Your rectus abdominis is a global muscle, so the seated leg raises are an excellent move to implement if you want to build a six-pack. In addition, you can increase ab hypertrophy by using ankle weights during this exercise.
How to Perform Bench Seated Leg Raises
Bench seated leg raises are done sitting almost at the edge of the bench. Lean back to between a 60 or 45-degree range and then grip the sides or the end of the bench. Bring your legs up too, but keep them hanging off the bench. Squeeze your abs and then raise your legs up and down to complete a rep. Throughout the movement, try to maintain a tight midsection.
The Rock makes them harder by taking his hands off the bench, but you should only do this if your stability is rock-solid hence The Rock’s name.
Bench seated leg raises have been around for a long time and are a trusted way to work your core and abs. Many bodybuilding legends and fitness professionals recommend this routine for building strong abs. It trains the entire core and helps you improve on other movements like deadlifts, squats, bench presses, and rows since strong abs have carryover to those compound movements.
Mistakes to Avoid When Doing Bench Seated Leg Raises
One mistake people with this routine is not concentrating on their abdominals during their reps. This could lead to lower back pain and injury. To avoid this, focus on your engaging your abs during each rep.
Raising your legs too high during this exercise will shift the focus from your core and abs to your back. You should avoid swinging your legs during the up and down movements to hasten the reps. This exercise requires maintaining control and keeping your core under tension for longer for better ab hypertrophy(2).
Finally, ensure you breathe correctly during seated leg raises to avoid feeling lightheaded or dizzy. Breathe in when lowering your legs and out when lifting. Taking deep breaths as you exercise will help you get enough oxygen flowing in your body.
Leg raises work on your core and abs, which stand out and help give you that muscular physique when you have little body fat. While several of the muscles in your abdomen are targetted, the rectus abdominis receives the most work.
When done properly, seated leg raises can also target your obliques. These muscles act as stabilizers during the hip flexing movement that you do with leg raises. Working on your obliques can help with coordination and balance.
Your hip flexors are many muscles that run from your pelvis to your thighs, and seated leg raises also target them. Your iliopsoas are your primary hip flexor muscles and are made of the minor and major psoas and the iliacus (3). Strengthening these muscles with leg raises is crucial to movement and helps to activate the core when the thighs are raised higher than the hip level.
Final Word
Bench seated leg raises are significant for strengthening your core and lower body. This leads to better coordination and stability when doing your other weight-lifting routines. In addition, the Rock says, “I’ve found that a strong core/tight abdomen wall is super beneficial to your gains.”
Bench seated leg raises will help you tone your body and build a six-pack. In addition, it bolsters your abdominal muscles, and you can add challenging variations to maximize your gains. So feel free to try bench seated leg raises the next time you train your core muscles.
Park, D. J., & Park, S. Y. (2019). Which trunk exercise most effectively activates abdominal muscles? A comparative study of plank and isometric bilateral leg raise exercises. Journal of back and musculoskeletal rehabilitation, 32(5), 797–802. https://doi.org/10.3233/BMR-181122
Mang, Z. A., Ducharme, J. B., Mermier, C., Kravitz, L., de Castro Magalhaes, F., & Amorim, F. (2022). Aerobic Adaptations to Resistance Training: The Role of Time under Tension. International journal of sports medicine, 43(10), 829–839. https://doi.org/10.1055/a-1664-8701
Cronin, C. G., Lohan, D. G., Meehan, C. P., Delappe, E., McLoughlin, R., O’Sullivan, G. J., & McCarthy, P. (2008). Anatomy, pathology, imaging and intervention of the iliopsoas muscle revisited. Emergency radiology, 15(5), 295–310. https://doi.org/10.1007/s10140-008-0703-8
The 2024 Empro Classic Pro will take place this weekend in Spain!
The 2024 Empro Classic Pro is scheduled to take place this weekend in Alicante, Spain. The Men’s Open lineup features a top-heavy roster that is looking to qualify for the 2024 Olympia.
Below, take a look at the full roster, along with the top contenders that will be battling for the prize in Men’s Open.
2024 Empro Classic Pro: Men’s Open Lineup
Men’s Open
William Bonac
Kuba Cielen
Stanimir Etov
Sasan Heirati
Anthony Jehl
Pawel Kowalski
Michal Krizo
Pablo Llopis Munoz
Morteza Mashayekhkordkola
Reece McDonald
Justin Musiol
Pascal Schlegel
Behrooz Tabani
Dan Thomas
Samir Troudi
William Bonac
William Bonac makes his return to the stage for the first time since 2022. He decided to take some time off and did not compete last year. Now, he looks primed and ready to take the stage once again. Bonac shared a physique update three weeks out from the Empro Classic and looked like he ever stepped away. The former Arnold Classic champ and Olympia runner-up can be considered the favorite to win this show by the looks of his update. He looked full and conditioned, which will make him difficult to beat on stage.
Michal Krizo brought his best package to the 2023 Olympia, where he finished seventh in just his second competition. Krizo is still looking to qualify for this year’s show. While that is the expectation at some point this year, Krizo might be bested by Bonac. This will be the battle to watch. If Krizo can come in peeled and proportioned, he will have a shot to take home the prize.
Behrooz Tabani is ready to turn some heads in Spain. He has been working with Milos Sarcev and this means he is expected to enter in top shape. Tabani has qualified for the Olympia in each of the last two years but visa issues kept him out of the show. He brings great conditioning and consistency each time he steps on stage but has been working to add size to his legs. He is a dark-horse that can take a big step by winning this show.